THE DAINTY SQUID
  • blog
    • all the posts!
    • stroup mansion
    • some of my favorite posts
    • plants + gardening
    • beauty, fashion + hair
    • reviews
    • window shopping
    • explore everywhere
  • about me
  • contact
  • shop
Category:

plants + gardening

grow light review

by Kaylah Stroup October 12, 2017

In 2016, I reached peak plant lady status. With an outdoor space all to myself for the first time since moving to the city, I went wild with plants. I learned to propagate, and my plant count was through the roof.

Then in the time between learning about my new apartment and finally moving in on January 1st of this year, I gave away most of my collection except for my absolute favorites. I knew I’d be moving to a space without a deck and indoor plant real estate would be limited. I didn’t think I’d be able to provide my plants with enough light. So many people say they have black thumbs but honestly, I think a lot of people just underestimate how much light their plants really need.

Even though I had done my best to weed out anything in my collection that needed lots of light, and kept the majority of my plants right near the window I could still tell they needed more. While browsing Amazon I spotted this grow lamp. For under thirty dollars, it seemed worth the risk. I really love having as many plants as possible around the house so this is a very small price to pay.

When I posted photos right after getting the lamps lots of people asked for more details and to be updated on how well they worked so that’s what I’m doing here today. I know that previous to purchasing this lamp, when I looked into artifical lights for my plants I just came out of my search more confused than ever. Just like propagation, aaaand every single other thing on Earth, everyone has their favorite way to do things, and thinks their way is best. I’m not saying this is the best grow light out there but it’s working really well for me so I thought I’d share a little bit about what I like about it.

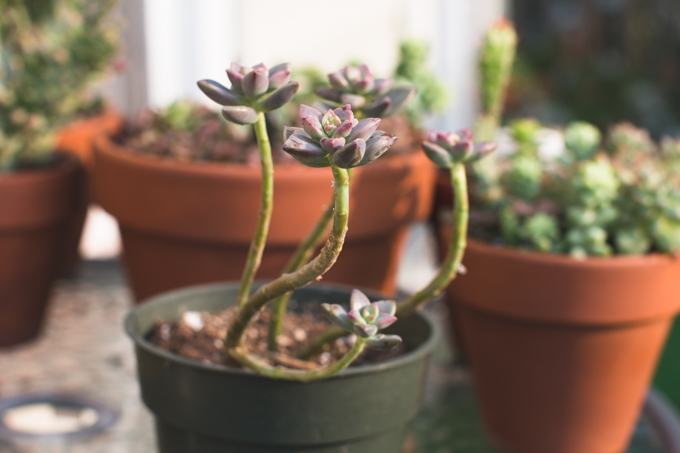
I’ve been using the grow lamp for just around a month now and can definitely see a difference in the plants I have placed near it. They reach for the lamp and in general, just look a lot perkier. My century plant (top right corner of the left photo below) went from just surviving to actually growing again which is a huge deal in my book. I was really sad to see the life starting to fade away from that guy after not being outside anymore.

The thing that really drew me to this lamp as opposed to some of the others available is that I didn’t need to hang it from anything. There are lots of lights available for shelving units but thats not how I have my plants displayed. This one simply clips on which works out really nicely since I have a bunch of plants on a little side table in my office.

The lights can be put on a timer, choose between 3 hr, 6 hr or 12 hr. The amount I choose depends on how sunny it is outside. If it’s super sunny, just three hours. Rainy, cloudy weather and they get the full day with the lamps on. It’s super easy to use, and requires barely any effort on my part – I just hit a button each morning and my plants love me for it!

rainbow, grow lamps, succulents, grow light

Plant lady tip –

Download the app ‘GardenAnswers‘ to help you identify plants. (It’s free!) You simply take a photo of your plant and it will try to match it to plants in their database. Knowing what you actually have is obviously super helpful in properly taking care of your babies!!

house plants, grow light, purple lamp

All in all, thirty bucks well spent on this grow lamp. My plants are so much happier with the extra light they’re receiving these days. I’m even thinking about picking up a second lamp for some of my other plants. I highly recommend considering an extra light source for your plants, especially with the days getting shorter and shorter as the seasons change.
xoxo

Save

0 FacebookTwitterPinterestTumblrRedditThreadsBlueskyEmail

Propagating Succulents 101

by Kaylah Stroup September 3, 2015

I haven’t been propagating succulents all that long but I’ve already learned quiet a bit and seen a great deal of success. Nearly every time I post photos of my babies on Instagram (…which is quite often) someone asks for help or exclaims frustration in their failed attempts to propagate. Propagation is incredibly simple once you know what you’re doing and it’s wildly satisfying! Today I’m going to share my method and a few tips that have helped me along the way.

Above left : Properly removed leaf

Above is the perfect example of a plant that has gotten leggy due to lack of sunlight, and is in prime condition to propagate. I went to my favorite local garden center specifically to find a plant for this post. This one had already begun dropping it’s leaves and growing pups in the container.

What you’re going to do is remove the leaves. It’s very important to remove them properly. I genetly twist them from side to side, holding near the base. You’ll feel a little snap when it comes off. You need to be careful not to rip the leaf or else it will not grow. There should be no piece of the leaf left on the stem. When I first started that’s what I was most nervous about; removing my first leaf. It’s really simple and after your first one it’ll be easy peasy!

Below :  Improperly removed leaf that will not grow

Remove all leaves that are a great distance apart from each other. After that you’ll be left with a pretty little rosette on a long stem. Your rosette may be made up of just three little tiny leaves, or a handful of larger ones it all just depends on the condition of your plant – either way it’s worth saving. Chop those bad boys off using sharp scissors, leaving an inch or so of stem. You’ll be able to plant them later.

Now you need somewhere to put all your leaves. I use a cake pan. It’s what I had on hand and it worked! I would never recommend something that doesn’t have holes in the bottom for your plants but because you’ll never actually be thoroughly watering the leaves or pups it doesn’t really matter. I fill the pan with cactus soil and perlite. (both of which can be found at Lowes, Home Depot or any garden center) I use approximately a 2:1 ratio. The perlite is important because it helps loosen the soil, and prevent compacting which helps with new root growth.

I lay out the leaves, and rosettes with the short stems on the soil/perlite mix and leave them alone for a couple days. The ends need to callous over or else they’ll absorb too much water and rot. After a few days I start spraying them with a squirt bottle. They don’t need much at all, just a quick mist. I do this daily. There are no hard and fast rules about watering your plants though. The best thing you can do is keep a close eye on them. Check on them every day, if they look dry, mist them. If not, leave them alone. Keep in mind that leaves without pups need less water than those showing growth.

They’re going to need lots of light to grow. Depending on your climate and your home just having your pan of leaves near a window should be sufficient. Leaves and the baby plants you’ll be growing are delicate; too much sun may burn them. After getting fairly comfortable with propagation I moved my babies outside where they receive maybe three or four hours of direct sunlight every day and they’re thriving. I wouldn’t recommend direct sunlight when you’re first starting out though. Start by a window that receives lots of natural light during the day.

Now it’s time to wait. Patience is important here! It’ll take a few weeks, some plants take waaaay longer than others, but eventually you’ll start to see growth. Keep misting regularly! The mother leaf will start to shrivel. I never remove it, I just let it shrivel up completely but if you do decide to remove it once you have decent sized new growth be sure not to accidentally rip off the roots.

When my new plants have grown to about the size in the photo above that’s when I start replanting them. They’re still very delicate and will need misted often. When replanting I use 3:1 or 4:1 cactus to perlite mixture. With ample water and sunlight your new babies should continue to thrive!

Everything in focus below is something I propagated myself

Tips for propagation success!
▴ SPRAY BOTTLE. Buy one, use it, be amazed! No, but seriously, you need one. If you try to just water your leaves and cuttings as you would a regular plant you’ll most likely drown them.

▴Don’t forget about the stem from your plant you took the cuttings from, that will produce new growth as well! Since it already has established roots it will produce growth much faster.

Growth on the stem after a few weeks
Growth on the stem after four months

▴ I once read “If it looks like a plant, plant it” and that tip has been invaluable. It seems so obvious now that I have an idea of what I’m doing with plants but as a beginner it completely opened my eyes to everything that I could propagate. Below is an example of something that I would have never thought to do anything with. That cactus is now what I would consider a mother plant, every time she produces new growth like the two bunny ears shown in the photos I remove them to make new plants. I’ve had nothing but success with that cactus and the pups, they root beautifully! This is a very general rule but if you can twist it off, like the leaves of succulents, you can grow it.

If it looks like a plant, plant it.

While researching propagation before I started I noticed that nearly everyone had a slightly different method, varying most when it came what to do after the leaves have calloused over. I decided to just do a mix of everything I read. It works wonderfully for me. If my method doesn’t work for you I definitely suggest doing more research. Don’t give up after one failed attempt! Propagation is WAY too much fun. You’ll be amazed how proud you can be of one tiny plant.

Good luck!
xoxo


To see more photos of my plant collection browse the “plants” tag or follow me on instagram.

Save

Save

Save

0 FacebookTwitterPinterestTumblrRedditThreadsBlueskyEmail
Newer Posts
Older Posts

About Me

About Me

Hello!

I'm Kaylah! Renovating a 150-year-old home in Northeast Ohio. Likely found in my garden.

Categories

  • all the posts!
  • animals + nature
  • beauty, fashion + hair
  • explore everywhere
    • abandoned
    • cemeteries
  • plants + gardening
  • reviews
    • books
  • some of my favorite posts
  • stroup mansion
  • window shopping

recent reads

disclosure

click to drop down
The Dainty Squid is a for profit blog. and we participate in a number of affiliate programs meaning, at no additional cost to you, I will earn a commission if you choose to make a purchase through one of those links. For more details click here

copyright 2025 the dainty squid / kaylah stroup. please contact me about photo usage.


Back To Top
THE DAINTY SQUID
  • blog
    • all the posts!
    • stroup mansion
    • some of my favorite posts
    • plants + gardening
    • beauty, fashion + hair
    • reviews
    • window shopping
    • explore everywhere
  • about me
  • contact
  • shop