A few years ago, I shared the beginning of my mourning jewelry hunt! Chronicled here – the beetle + the mourning ring & mourning ring 2.1. Well, I think I have finally completed my mourning jewelry collection.
You know that’s a lie, I’ll absolutely be buying the next piece that tickles my fancy.
Either way, it’s high time I write up a little something about my mourning jewelry collection. Without further ado…
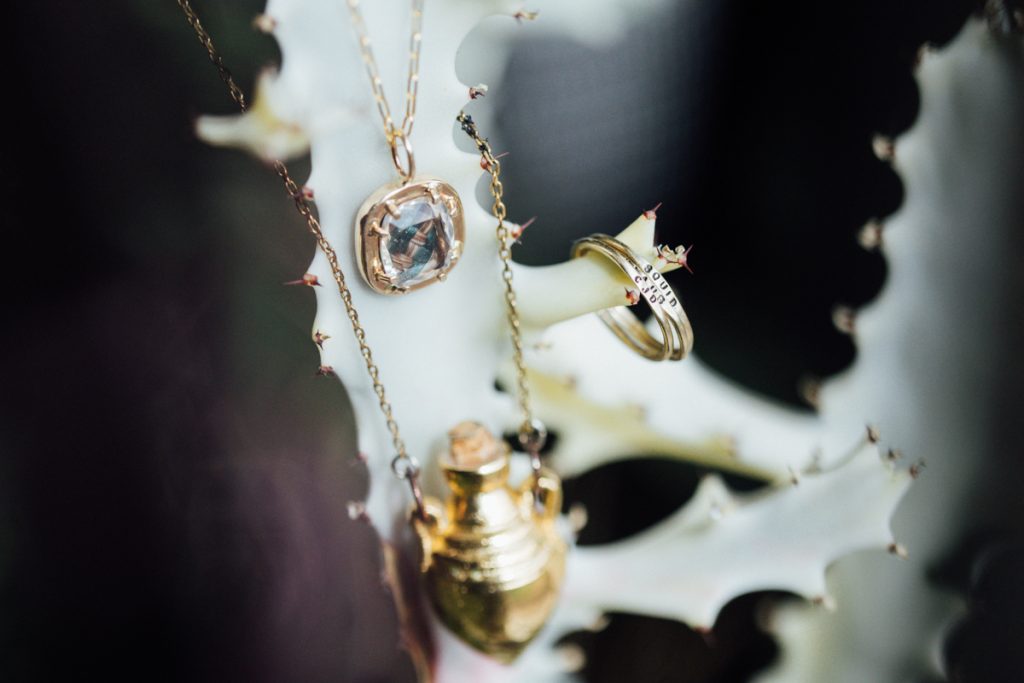
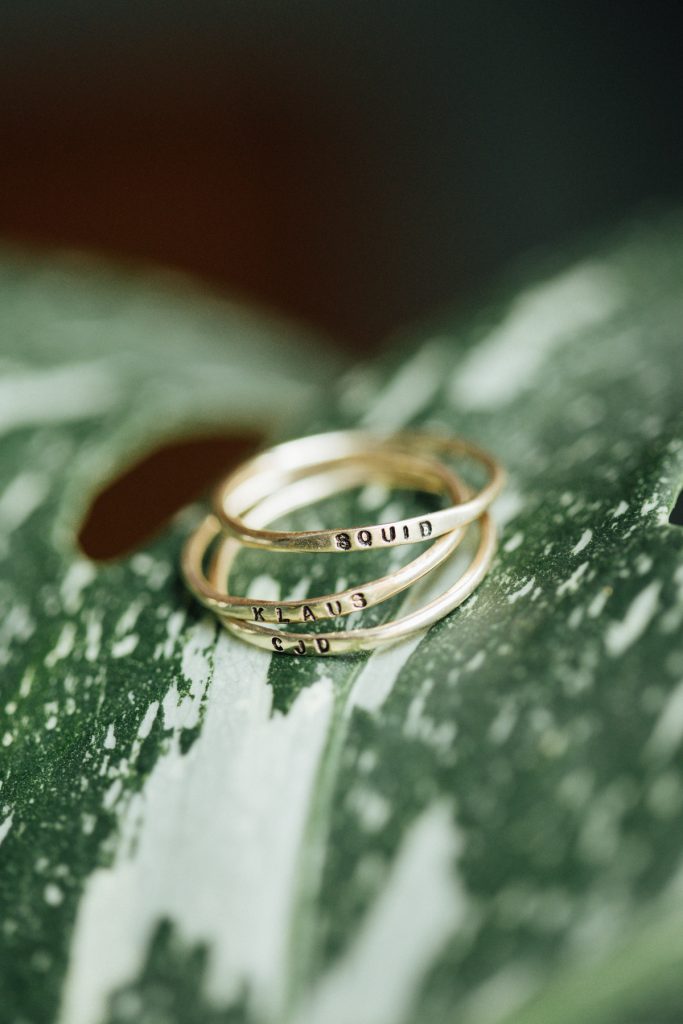
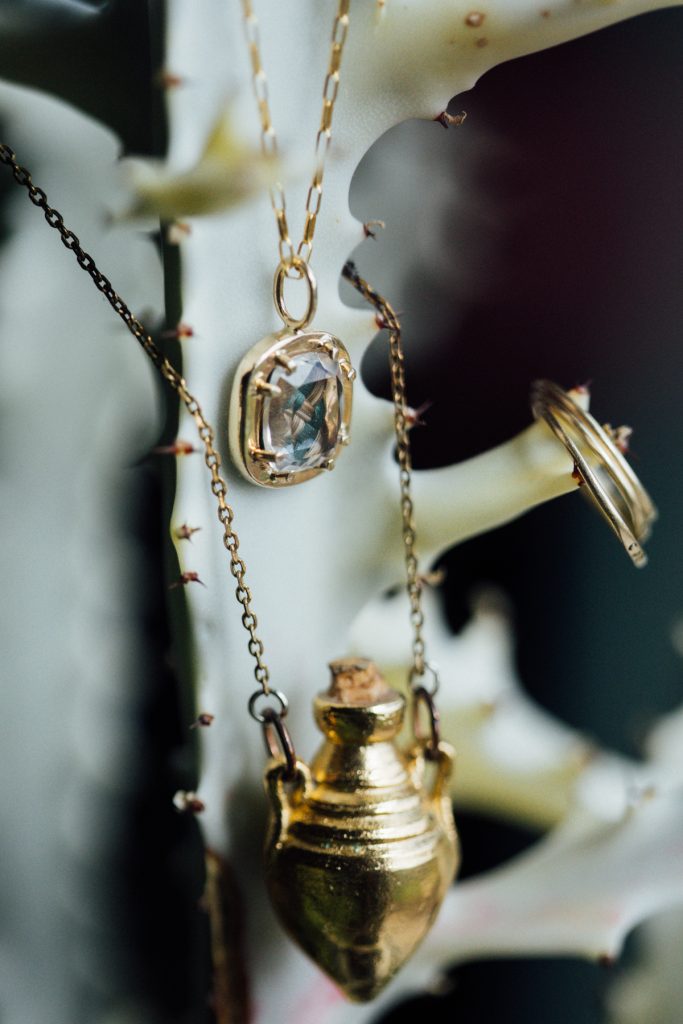
My most worn pieces are gold rings with stamped names/initials. Over the past few years, I’ve bought three of the same style ring from Kathryn Riechert Jewelry. The one I purchased is 14k solid gold, but they also offer sterling silver if gold isn’t your thing or simply isn’t in your budget! (Gold prices right now? Woof!)
I have had the one for my mom for six years now, and it’s held up beautifully. (I mean, it’s gold jewelry, of course it has!) The reason I love these so much is that I never have to take them off. They are on me twenty-four-seven. I live a very hands-on life. Between renovating my old house, gardening, and making art, my hands are always dirty and getting banged up. For a brief moment, I had a different ring with my mom’s cremains, but it just didn’t fit my lifestyle (or style for that matter!) With these, I don’t have to worry about snagging them on anything or losing any pieces. They’re simple, and that’s what makes them so great.
Honestly, jewelers across the globe are probably screaming right now, having read that. It’s probably not great jewelry advice to leave your rings on like that, but I like feeling like my mom, Squid, and Klaus are still close, and having these rings on helps with that.

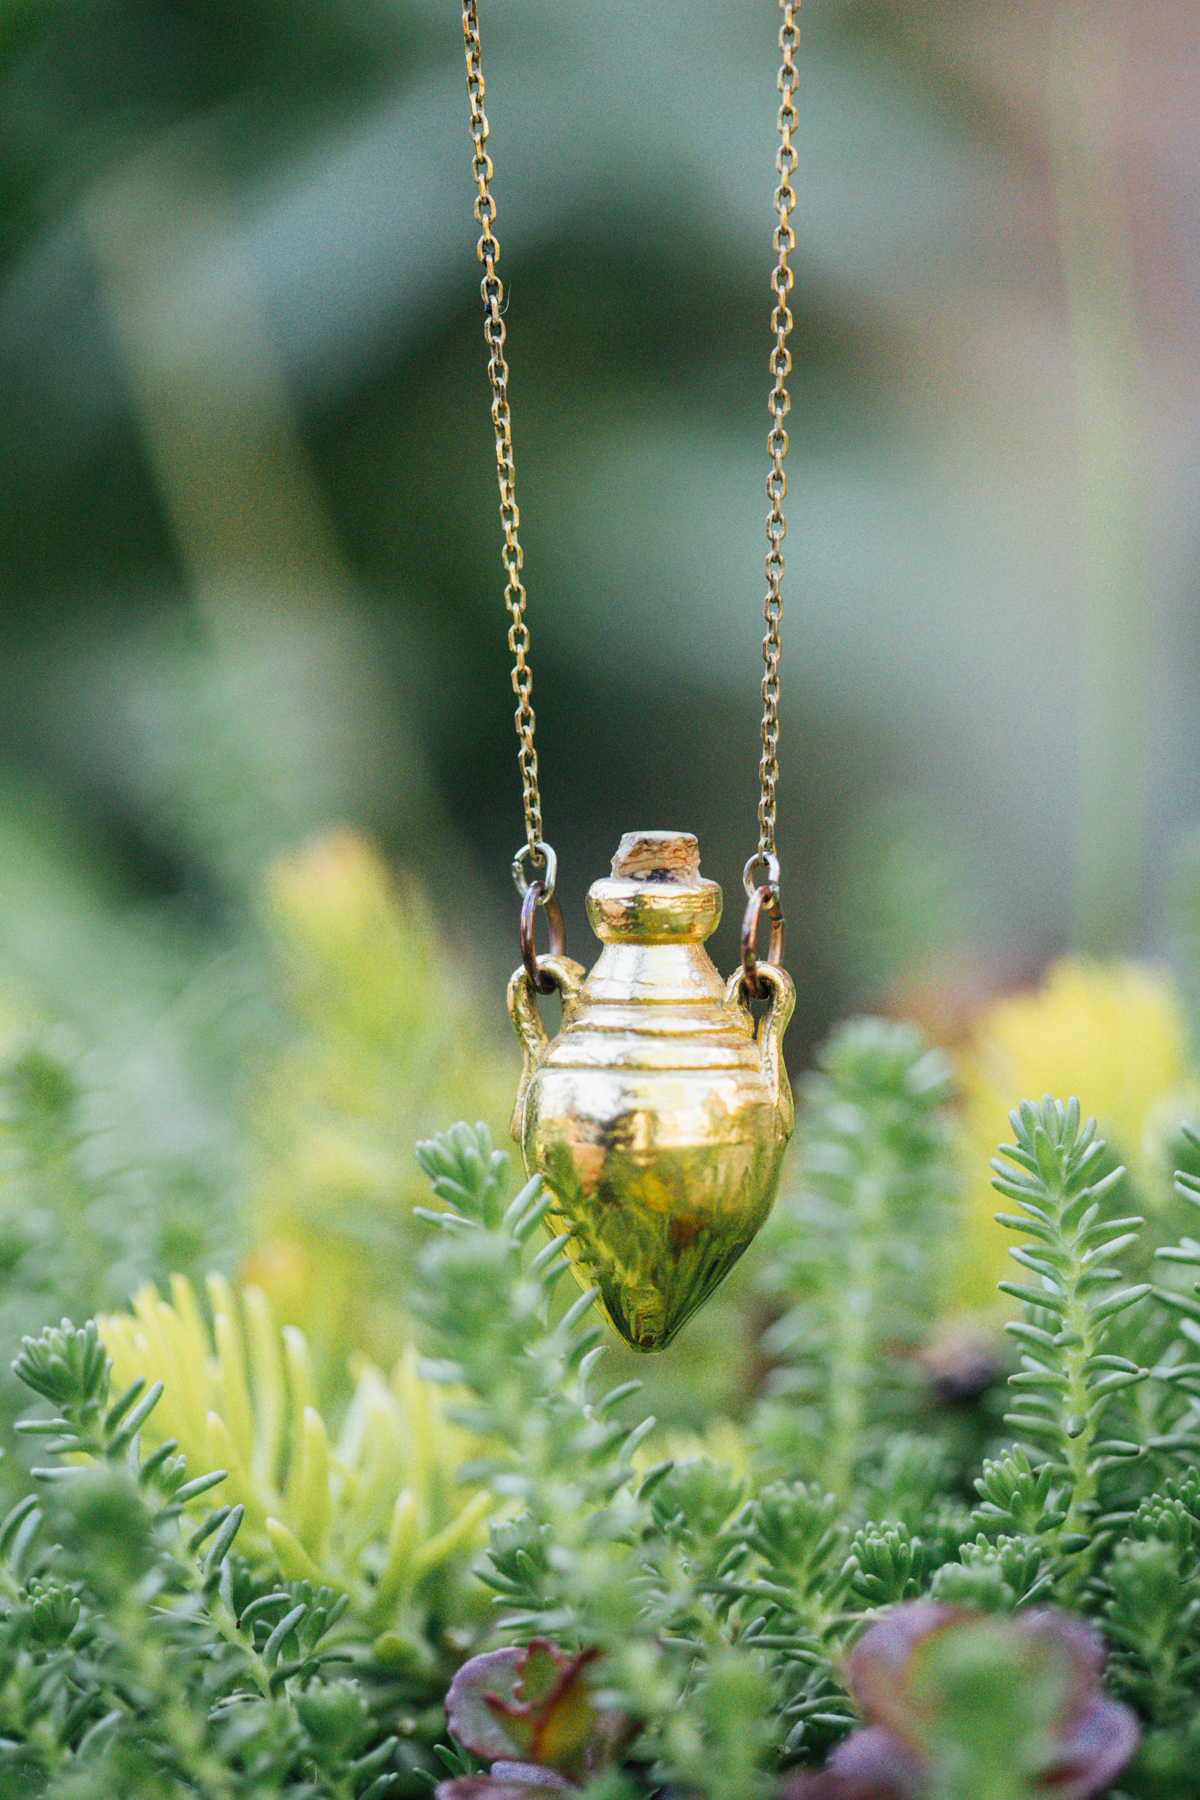
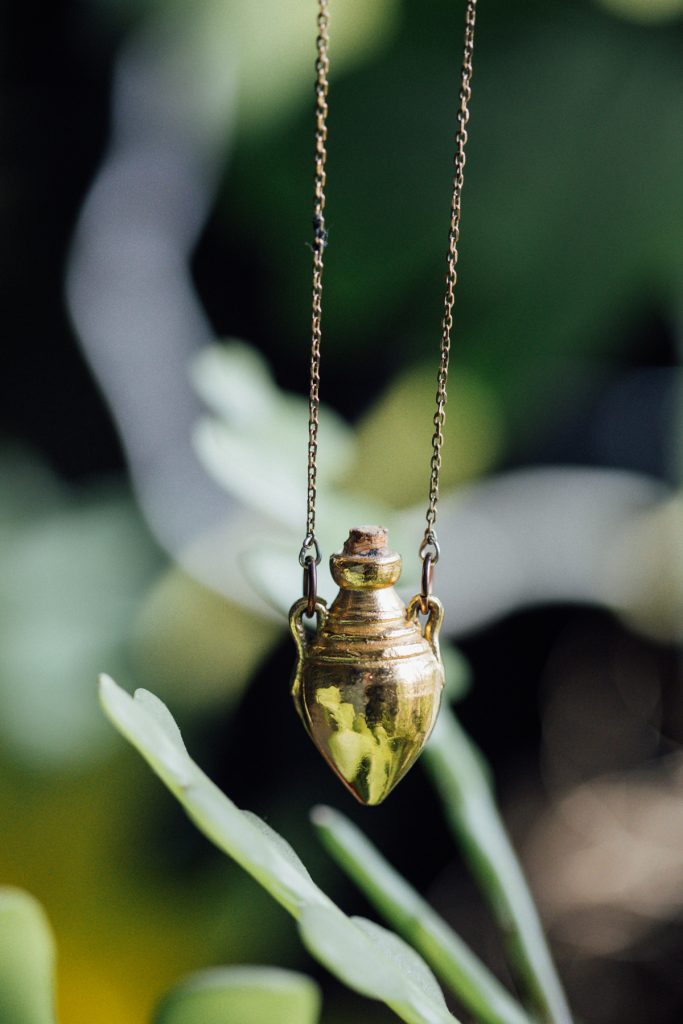
The next piece I have is a vessel for my mom’s cremains. There are SO many options when it comes to ash carrier pieces, but oddly enough, finding something that fit my style was quite a challenge.
I eventually found Heron and Lamb on Instagram and found the perfect piece. This necklace isn’t something I wear all the time. This is my ‘Man, I wish Mom were here. She’s dead, but I’m bringing her anyway!’ occasion necklace. Every holiday, birthday, graduation, etc – She’s around my neck.
Heron and Lamb doesn’t necessarily market their pieces as mourning jewelry, so when you’re scoping out their jewelry, make sure the vessel is listed as functional and not solid. (Each one of their pieces mentions this in the description.) I filled the vessel myself, sealed it with a small stopper, and some super glue.
I love that this piece is so dramatic. Every single time I wear it, someone comments on it (and I get to respond “Thanks, it’s my mom!”).
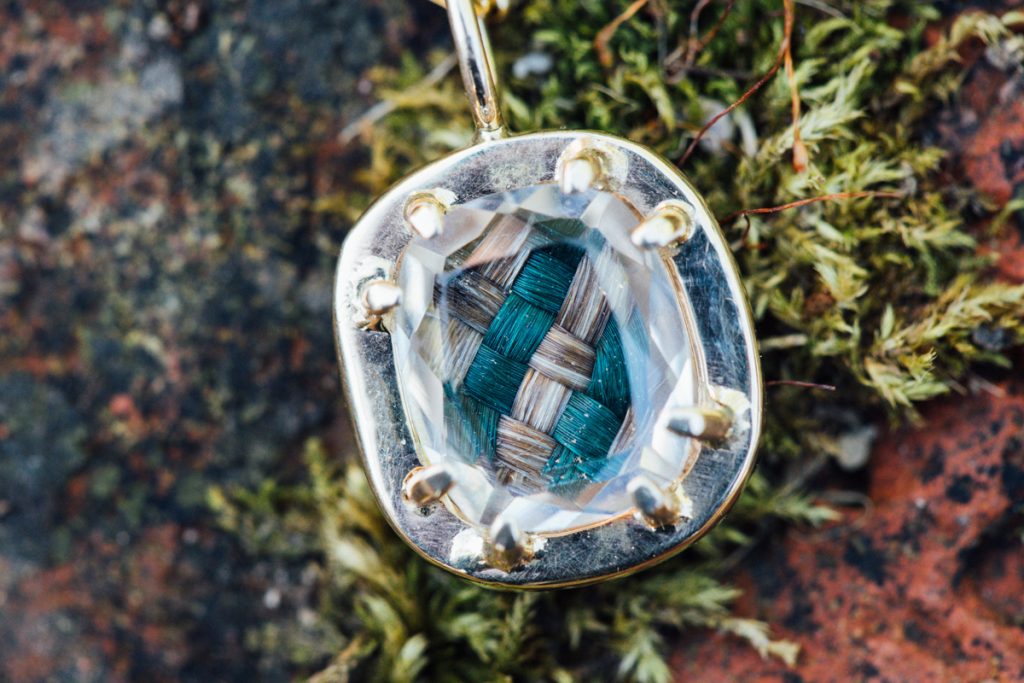
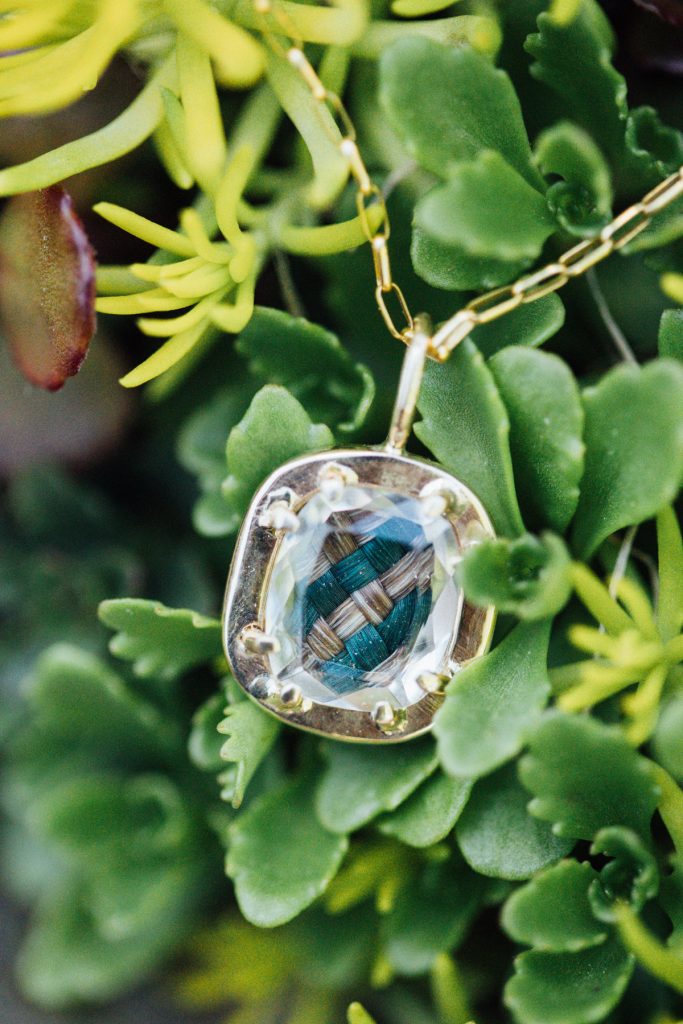
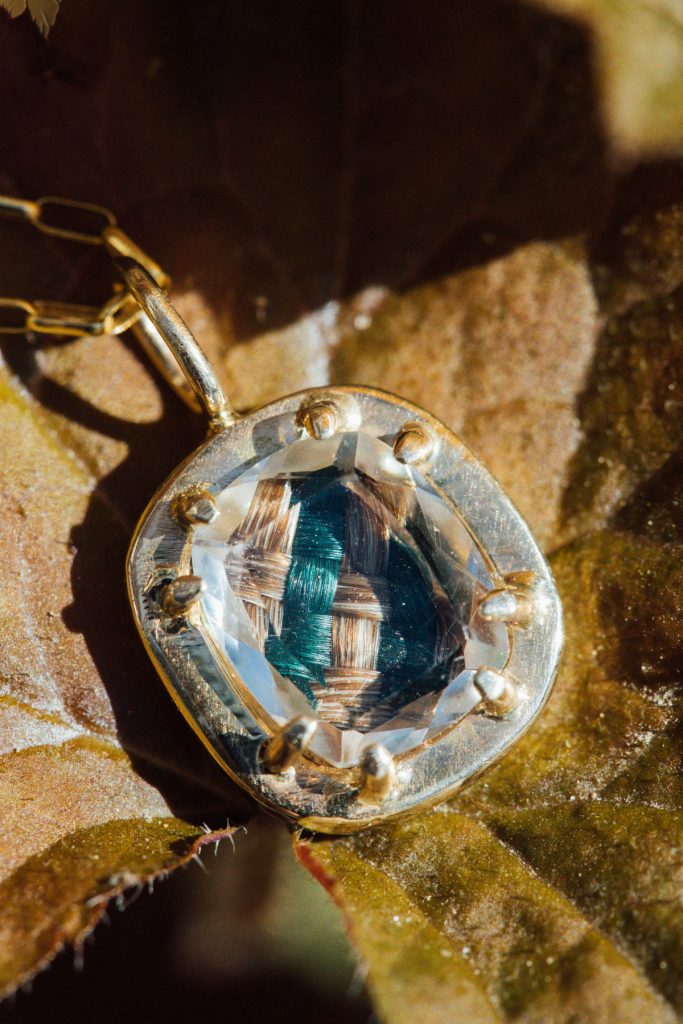
gold specks under the quartz crystal will fall out over time. it’s not dirt! 😉
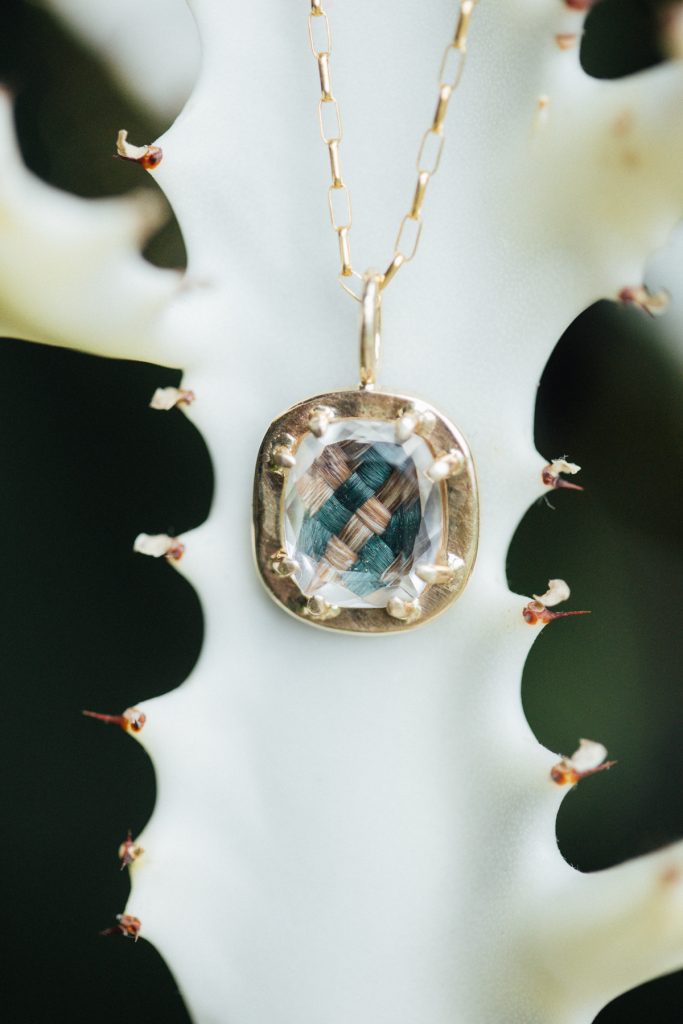
The pièce de résistance though? The hairwork necklace of my dreams!!! This is my mom’s hair braided together with mine. (In case you’re curious, I had a big lock of my mom’s hair because she always let me cut her hair. My hair was harvested from my hairbrush.)
This piece was made by my lovely and very talented friend, Mickey Alice Kwapis. Mickey is wildly talented in a variety of disciplines. She makes custom lockets with sentimental items as well as doing hairwork. You can view the info on getting your own custom piece here. You should also scope out her Instagram as well; she shares a lot of fun custom work over there.
I genuinely don’t even know what to say about this piece. It’s what I’ve been dreaming of since the second I started considering buying a piece of mourning jewelry. I
It’s so incredibly special, I just wish I could show my mom.

That’s all I’ve got at the moment! I’ve got my fingers crossed that no one else ever dies, so I never have to purchase another piece in my life. Hah!
xo