THE DAINTY SQUID
  • blog
    • all the posts!
    • stroup mansion
    • some of my favorite posts
    • plants + gardening
    • beauty, fashion + hair
    • reviews
    • window shopping
    • explore everywhere
  • about me
  • contact
  • shop
Category:

plants + gardening

#1 houseplant care must have!

by Kaylah Stroup September 26, 2019
Dr. meter moisture meter review

Okay, so maybe this isn’t the “#1 houseplant care must have”. I’d say that goes to proper lighting or pots with drainage. BUT, holy cow, it’s been a major game changer for me!

The Dr. meter moisture meter! *cue angels singing in the background*

It is a small device that you poke into the soil of your plants (indoor, outdoor, potted or not) that gives you a reading of the moisture level immediately. It doesn’t need a battery and is ready to use as soon as you take it out of the packaging. The back of the box includes a list of some plants and what moisture level they like to be at.

It’s obviously way more accurate (and less messy!) than poking your finger into the dirt. Previously, that’s how I’d check if my plants needed water but I quickly realized how much more of a superior method was. Not to mention, it’s small and easily fits in places my hand wouldn’t – like into the pot of a spiky cactus!

Dr. meter moisture meter review

From the day I got it, I was very into it. About a week after starting to use it though? OBSESSED.

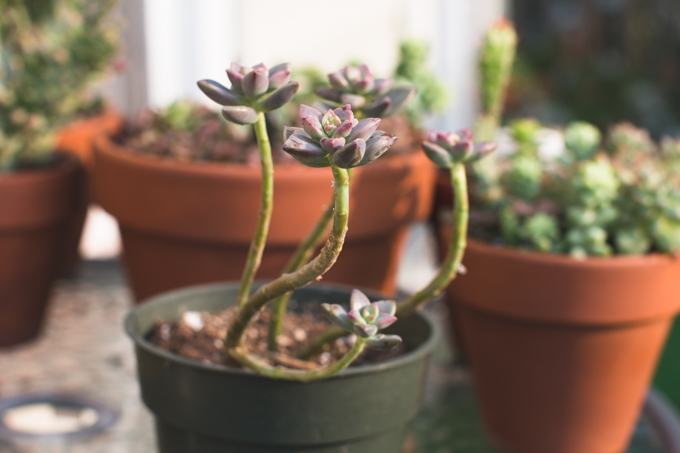
Here’s my little success story about the moisture meter: So, I have this chenille plant. This is what it looked like when I brought it home. Gorgeous, right!? The first few weeks I had it, it started dropping it’s fuzzy pink chenilles. I wasn’t too worried, figuring that maybe I bought it during its showy season and now it was going to kind of just chill for a while before blooming again in a few months. Then my leaves started to look kind of icky. I wasn’t really sure what I was doing wrong. I felt like I was following all the stuff I’d been reading online about it but still, it wasn’t improving.

The first time I used my moisture meter I poked it into my chenille plant. It read as a “1” meaning very dry which was weird because I had watered it that morning. I watered it, waited until morning and checked again. The meter yet again said “1”! It took a few days of this cycle before I realized that that plant just LOVES to drink. I don’t water anything else in my collection that often or even close to that often but the moisture meter helped me figure out that where I had my chenille plant placed made it really, really thirsty and that it was a plant that liked to be moist all the time.

It’s a been a little under two months since I’ve had the Dr. meter moisture meter. Every single one of my plants has benefited from this silly little thing. I honestly really thought I was good at knowing when to water my plants and how much moisture they liked but this has shown me otherwise.

My chenille plant still is nowhere near as fluffy pink as it was when I brought it home but each week its producing larger and larger chenilles. It’s on the up and up all because the moisture meter helped me figure out how quickly it drank.

I use my moisture meter at least once a day on some of my more high maintenance plants. It’s a bit addicting for me to see what their moisture level is at different points in the day. It’s helped me learn a lot more about my plants which of course, helps me take better care of them.

For the price (currently under $10!) you can’t beat it! The Dr. meter moisture meter will be a staple in my plant supplies for life.

You don’t leave the meter in the plant. This is just me showing you a thirsty plant! 😉
0 FacebookTwitterPinterestTumblrRedditEmail

my mother’s plants

by Kaylah Stroup July 29, 2019
July 20th – Face planter by Kinska

Grief for me has been cycling through the polar opposites of ‘save everything!’ and ‘throw it all away!’ Sorting through her storage room in my dad’s garage a few weekends back with my sister-in-law, I found myself when asked what to do with something, more often than not, answering “Goodwill pile!”

Guess it was just the mood I was in because I’ve kept so many random things that had she’d of offered me I’d have said ‘no’ to. Recipes she printed and wrote her own notes on, her flannel shirts, her pajama pants (most of which I recognized from our shopping trips together), her fuzzy socks and so much more stuff I 100% do not need. Buuut my grieving brain insists it’s all special.

June 25th – The day I brought it home. I had already trimmed off all the dead leaves.

One Sunday, while the guys worked on the bus, I walked down to the house and did a little housework for my dad. I noticed three dead looking plants on the staircase landing. I figured I should ask before tossing them despite already knowing that my dad wouldn’t be interested in caring for houseplants. After confirming he didn’t want them, I climbed back onto the landing and got a closer look. They were definitely hurting after not being watered for 2 and a half months but two of the three were possibly salvageable…

I tossed the completely dried out one. The largest I pruned the dead leaves off and decided that it was worth trying to save. The third had completely wilted leaves but didn’t seem beyond repair. I chopped off the leaves to try and propagate and gave the root base to my niece to grow.

June 26th – One day after water. Already perking up!
June 26th – First day in water. I let the ends callous over for a day before placing them in water.
July 2nd

Five days after being placed in water, I already had the start of roots and much healthier leaves!

July 2nd
July 7th – The start of two new leaves!
July 11th – Look who is opening up!
July 20th

As much as I love growing things in water and watching the roots grow and change, I really wanted to get these leaves in soil ASAP. I planted and replanted these darn things at least four different times before finally deciding on how I wanted them arranged. I thought one super full pot would be neat but I didn’t have the right sized pot and I figured two would give me a better shot at least one surviving. (…Not that I really have any doubts but ya know!) So two pots it was. One larger for all the big cuttings, and a smaller one for the more petite cuttings – who interestingly enough had much larger roots.

July 20th – Right after being planted.
July 29th
July 29th – More new leaves coming in!
July 29th

My mom was never really a house plant type of person but anyone who had ever been over to the house would tell you how much she loved to garden. She kept such beautiful flower beds. My love of plants definitely stemmed (heh!) from her. When I moved to the city and no longer had an outdoor space, I started bringing the outside in. It was then I convinced her to try growing things inside as well.

All of that to say, it feels a little weird to be putting so much importance on these plants that I’m not sure she ever loved, at least not as much as the ones she grew outside. It’s a perfectly me way of dealing with grief though, especially since tending to my many houseplants is already so cathartic to me.

I look forward to continuing to watch these plants grow and hope that they continue to bring me at least a little bit of peace. My mom may be dead but she lives on in so many other ways.

July 29th – The start of new leaves on this tiny guy!
0 FacebookTwitterPinterestTumblrRedditEmail

gift guide for plant lovers!

by Kaylah Stroup December 12, 2018


plant lady, plant lover, gift guide
1. brass mister. Misted plants are happy plants!
2. monstera enamel pin.
3. 4″ pilea. Instagram’s favorite plant. I won’t lie, it’s one of my favorites as well.
4. Leaf Supply: A Guide to Keeping Happy Houseplants.
5. stacking planter. Love this planter! It’s plain white which means it will match any decor but it still has a lot of style. Mine has a pilea planted inside.
6. plant lover enamel pin.
7. Urban Jungle: Living and Styling with Plants.
8. plants get me socks.
9. grow lamp. Chances are everyone’s house plants could use a bit more light. These lamps are inexpensive and make a world of difference! Check out my review here.
10. let’s trade cuttings enamel pin.
11. plant mom enamel pin.
12. rattlesnake plant. One of my absolute favorite plants! This beautiful thing wakes up and goes to sleep every day – check out this GIF I made!
13. face planter. Another favorite thing of mine, this planter is even cuter in real life and a great deal for such a high quality item.

cactus cardigan

Friend Assembly face planters

plants make people happy // plant tote

I specifically chose to link to this tote because it has a large flat bottom making it perfect for trips to the garden center. That tote with a small plant inside is *the* perfect gift, doesn’t even need to be wrapped!

cactus neon light

Check out some of our previous gift guides –
▴ 30+ gifts for your ~weird friend (+2017 version)
▴ Enamel pin gift guide (+ 2017 version)

I’ve got an even more extensive list of plant-related items here which includes tons of live plants you can purchase online!

0 FacebookTwitterPinterestTumblrRedditEmail

adventures in avocado propagation V

by Kaylah Stroup July 19, 2018

adventures in avocado propagation

June 19th, 2018

It’s been a little while since my last avocado propagation update and a lot has changed. Back on June 2nd, the pit shown above had fallen from the windowsill where I had it and split in two. I briefly considered throwing it away opted to put both pieces back in the container together to see if it’d continue to grow. I’m glad I gave it a chance because it definitely continued to grow. By the time we got back from our wedding trip, it had grown so much that it barely fit in the container. It was at the point where it would halt the growth because it was so resitricted or just break out of the glass.

Originally I thought that I’d just leave them in the water indefinitely. I really do enjoy watching the roots grow and change but this one seemed like it’d be a good one to experiment with. On June 19th I popped it in a small planter.

June 27th, 2018

Five of the six pits I have growing. (Number six being the one in the tooth planter.) I think it’s really interesting how differently each seems to be growing.

That one in the middle? It was my first to sprout but it didn’t take long before I realized how weird it was compared to the others. As I said, they’re all kind of doing their own thing so I was thinking that maybe it was just a different kind or something. Time went on and it never seemed to get any bigger. I thought it was especially strange that the leaves weren’t opening up. I just kept letting it do it’s thing though.

Fast forward to last week, I gently pulled one of the leaves open and there were mealy bugs!! So disappointing! I tossed that badboy straight in the trash and picked up some neem oil to protect the rest of my plants. So far I haven’t seen any others. Hopefully this was just an isolated incident.

July 4th, 2018

July 3rd, 2018

I decided to trim this guy down to help promote healthier, fuller growth. I kind of just winged it. This whole process has really just been about experimenting so I figured it wouldn’t be too big of a loss if it never grew back. It didn’t take long before I started noticing new growth!

In hindsight, I think it should have cut it lower, most likely below the first little sprout. No big deal though. I’m excited to see what it does from here and if I can see a difference between it and one I didn’t trim back.

July 11th, 2018  —-> July 13th, 2018

July 17th, 2018

avocado plant leaf

July 17th, 2018

Planted two more of the pits in dirt. One now lives with my pencil cactus, and the other in a small pot of it’s own. This decision was mostly based off the fact that the water was getting dirty really quickly. Since I started them, I’ve been changing the water fairly frequently. Most of the time it was even dirty but these last few weeks it’s murky looking in no time at all. I don’t quite understand why but figured maybe it really was time to plant them.

It’s been such a long process. The first photo I have from this whole adventure is from January 12th. Six whole months and I feel like I’m just now seeing real results. I mean, of course roots sprouting, growing, and changing was thrilling but I officially have leaves on something that came from food. Gardening is a blast!

Have you started your own avocado pits yet!? If you couldn’t tell, it’s pretty darn satisfying.
xoxo

Past updates – part 1, part 2,  part 3 + part 4.
Here’s a link to the tooth planter, if you’d like to grab one for yourself.

0 FacebookTwitterPinterestTumblrRedditEmail

adventures in avocado propagation IV

by Kaylah Stroup June 19, 2018

May 21st, 2018

Look how wild that one is getting! I’m a little grossed out by how… meaty(??), for lack of a better word, it is on the inside. At this time it seems to be the only one growing all that extra stuff.

May 26th, 2018

Look at all that growth! I’m super impressed with how quickly my little sprout seems to be growing. For a while it felt like it’d never make it’s way out and now every time I look at it I’m shocked how much taller it is. Even comparing these photos to the ones on the 21st of the month you can see how much it grew.

May 29th, 2018

We put the air conditioning unit in the window and all of my plants had to be moved from the kitchen table! I’m a little bummed because they did look so pretty there, all grouped together but they’d never survive with cold air pumping in on them.

June 2nd, 2018

Lots of growth and an accident. One of my containers slid and fell from my even so slightly slanted windowsill. I was pretty disappointed, especially since that one seemed to have some really interesting and healthy looking roots. Instead of throwing it away, I decided to just pop it back into the container, and see if it would still grow. Worst case scenario? It dies. Best case? I grow a tree!

June 14th, 2018

Didn’t see my avocados for over a week while I was off getting married. I expected to see a bit of change but I definitey did not expect to see all the growth that happened. All of my roots are SO wild! Pretty sure that one is just some sort of alien, not really an avocado! Look at the roots!

The photo above (and the one below) show the pit that had fallen and broken. Clearly that didn’t hinder it in the least. When I placed it back in the container the two pieces were carefully leaned up against each other so they wouldn’t just fall into the water. When I got back from the trip and finally checked on them there had been so much growth that they were both firmly pressed up against the glass. I’m thinking I might need to move it into a larger container so that it continues to have room to grow.

June 17th, 2018

Look at the leaves starting to open up on that guy! I’ve waited so long for this!!

Have you started your own avocado pits yet!? If you couldn’t tell, it’s pretty darn satisfying.
xoxo

Past updates – part 1, part 2 + part 3.

0 FacebookTwitterPinterestTumblrRedditEmail

plant pressing tips

by Kaylah Stroup May 22, 2018

plant pressing tips

Around eight years ago I became interested in pressing plants. My love for the hobby has a sort of natural ebb and flow that’s fairly dependant on the season. Winter, obviously, isn’t a great time to find specimens. As soon as spring comes around each year I fall right back into old habits. Picking and saving all the prettiest little plants! It’s fun, it’s easy, and it’s really satisfying!

Every time I share photos of my pressed plants I get a few questions on my methods. I’m all about experimenting with what I’m pressing and how I do it. There is no wrong way to do it unless of course, you’re not getting the results you want. I thought it might be helpful if I shared some tips for pressing plants that I’ve learned through trial and error and some information on what I use.

My supplies and method

I always keep a notebook in my bag for pressing plants. No matter where you go there is always an opportunity to find something pretty to press. I like these moleskin notebooks because of the size and the band that keeps it closed but honestly, any type of book works! Word to the wise, don’t press in any super special books. It will leave marks and potentially ruin the pages. This is why I like to have a dedicated notebook on hand.

When I get home I always try to empty my notebook so I have lots of room in case I hit the jackpot next time I step outside. Your specimens will most likely dry just fine if you leave them in your small notebook (I leave mine in there about half the time) but for the best results, I recommend doing this next step.

After I’ve emptied out my findings for the day I transfer all the plants to a larger notebook but not before first sandwiching them between paper towels. This really helps the drying process because all the moisture gets soaked up in the paper towel. After everything is neatly layered in my notebook I cover it with something heavy and try to forget about it for a week or so. Drying time obviously depends on the plant size!

After they’ve dried completely you’re free to do whatever you’d like with them. I normally move mine to yet another notebook (this one is perfect!) and tape down my plants with some washi tape. I tape them down because it holds them in place, looks nice and keeps them organized. Also, I can remove them if I ever want to use them for another project. The ones that don’t get organized in the notebook are placed in a Rubbermaid container. Just make sure not to place anything in the container that isn’t completely dry. If you add moisture, you’re probably just gonna end up with a moldy container of rotten plants.

I have plants that I dried many many years ago that are still holding up beautifully! They’re fragile, of course, but their colors haven’t faded.

Some tips!

▴ Press the prettiest! Let me state the obvious here, your plant isn’t going to get any prettier after being pressed! Make sure to choose the healthiest looking one of the bunch.
▴ Say no to plastic. There needs to be something to absorb to moisture or someway for to it to escape so avoid putting plants in plastic baggies or airtight containers before they’re dry.
▴ Press fresh things. You really don’t want to press plants that are already dry or dead, they’ll just crumble.
▴ Remember that however you put them in your notebook is how they’re going to look when they’re done. Arrange all stems, leaves and other parts exactly how you want them to be when they’re dry before you close up your notebook.
▴ Make sure your specimen is dry to the touch. Carefully wipe off any moisture before pressing.
▴ Use paper towels that are flat and do not have a bumpy design on them or else that design will be imprinted on your plants. I’m partial to Viva.
▴ Try not to put big juicy plants near small nearly dry ones in your notebook or else the moisture from the big one may compromise the quality of the small one.
▴ Keep a small piece of paper towel folded up between your phone and its case to press plants when you don’t have a notebook. I mostly use this for when I find four-leaf clovers. You’re going to want to get them out of here as soon as possible since it traps moisture but in a pinch, it’s a great thing to have.

I think that’s just about everything! Like I mentioned at the beginning of the post, flower pressing is all about trial and error. After a little bit of practice, you’ll have your own routine that works for you. If you prefer to go a different route, plant presses exist (and have great reviews). I’ve also tried microwave flower presses! I always end back up at my favorite method though, the notebook! All you need to get started is a book of some sort to squish plants in between and you’re good to go!
xoxo

0 FacebookTwitterPinterestTumblrRedditEmail

adventures in avocado propagation

by Kaylah Stroup March 13, 2018

In my last apartment, I went plant wild. It was the first time since moving to the city that I had an outdoor space and I utilized the heck out of it. I amassed quite a collection of plants both large and small! (Seriously, look at them all!) Sitting on my porch, with the sun on my back, attending to my plant babies was the ultimate way to relax.

Sadly, my current apartment doesn’t offer any private outdoor space for plants. Before moving in, at the beginning of 2017, I gave away a ton of my collection because I knew I most likely wouldn’t be able to keep them alive. I kept a few of my favorites (which was still a lot of plants to squeeze into our place) and I’m still finding new ways to satisfy my urge to grow things. Most recently I’ve been learning to grow cuttings in water. They’ve quickly begun to take over my kitchen table.

January 12th

This little obsession all started on instagram. I follow a handful of plant accounts and would always see things being grown in water. I’m fairly knowledgable about propagation when it comes to growing things in dirt but water was a whole new world. I did a little research then threw some cuttings into a cute little container I found at an estate sale.  It was a success, and I wanted more… (Check out dem roots!)

We eat a ton of avocados so clearly the natural progression here was for me to start trying to grow from them. I researched, and researched. I read a ton about what a pain in the butt they are to grow, and how most fail. But with the perfect container and an avocado pit already sitting on the counter, what did I have to lose?

I poked three toothpicks into the pit, popped that into the water, and waited.

February 18th

It didn’t do much for a while, basically just sat there and looked weird, but that didn’t stop me from adding more pits to my collection. I even picked up some cute little beakers perfect for growing in.

February 24th

Finally, a little after a month of sitting in the water, my oldest one split. Eventually I was able to see some roots peeking out which was beyond exciting. I’m pretty sure I checked on how it was doing every single time I walked past the table.

February 26th

More root growth! Just seeing those roots poke out the bottom felt like a huge success.

March 3rd

Added a few more pits to the collection… Help, I can’t stop!

March 6th

A second pit has cracked open! And just look at the root on my first pit!! So awesome! That one has cracked all the way open and if you peek inside with a flashlight you can see a sprout heading up toward the top.

March 8th

A few things I’ve learned / been doing / think might help other folks…

  • Growing from an avocado tree from a pit takes a long time. It’d take years to produce fruit and if it eventually did it mostly likely wouldn’t taste the same.
  • There’s a top and bottom to the pit. The bottom goes in the water. It’s pretty easy to tell which side is which based on the shape (fat bottom) but the fool proof way is to look for the circle shaped mark – that’s the bottom and where your roots will grow out of.
  • Changing the water once a week or so is a good idea so nothing else starts to grow, the water doesn’t get funky, etc.
  • Just like any other plant they need sunshine, so place them near a window.
  • Totally not necessary to take the skin off, and doing so may damage the pit. After a few days in the water it usually gets soft and is super easy to peel off. I’m the kind of person who likes to pick at things hence why nearly all mine have been removed.
  • PATIENCE. This is seriously such a slow going thing but it’s also super easy. Just make sure they’re getting enough sunlight, don’t have gross old water, and you’re good to go!

I’m so excited to see how my plants look in another month! I currently have no plans to move them to dirt. I have enough plants growing in pots so its fun to do something a little bit different. Not to mention, watching the roots grow is just incredible. It’s really fun to be able to see that for once.

I’ll be sure to update y’all on my progress. Cross your fingers they all sprout!
xoxo

0 FacebookTwitterPinterestTumblrRedditEmail

grow light review

by Kaylah Stroup October 12, 2017

In 2016, I reached peak plant lady status. With an outdoor space all to myself for the first time since moving to the city, I went wild with plants. I learned to propagate, and my plant count was through the roof.

Then in the time between learning about my new apartment and finally moving in on January 1st of this year, I gave away most of my collection except for my absolute favorites. I knew I’d be moving to a space without a deck and indoor plant real estate would be limited. I didn’t think I’d be able to provide my plants with enough light. So many people say they have black thumbs but honestly, I think a lot of people just underestimate how much light their plants really need.

Even though I had done my best to weed out anything in my collection that needed lots of light, and kept the majority of my plants right near the window I could still tell they needed more. While browsing Amazon I spotted this grow lamp. For under thirty dollars, it seemed worth the risk. I really love having as many plants as possible around the house so this is a very small price to pay.

When I posted photos right after getting the lamps lots of people asked for more details and to be updated on how well they worked so that’s what I’m doing here today. I know that previous to purchasing this lamp, when I looked into artifical lights for my plants I just came out of my search more confused than ever. Just like propagation, aaaand every single other thing on Earth, everyone has their favorite way to do things, and thinks their way is best. I’m not saying this is the best grow light out there but it’s working really well for me so I thought I’d share a little bit about what I like about it.

I’ve been using the grow lamp for just around a month now and can definitely see a difference in the plants I have placed near it. They reach for the lamp and in general, just look a lot perkier. My century plant (top right corner of the left photo below) went from just surviving to actually growing again which is a huge deal in my book. I was really sad to see the life starting to fade away from that guy after not being outside anymore.

The thing that really drew me to this lamp as opposed to some of the others available is that I didn’t need to hang it from anything. There are lots of lights available for shelving units but thats not how I have my plants displayed. This one simply clips on which works out really nicely since I have a bunch of plants on a little side table in my office.

The lights can be put on a timer, choose between 3 hr, 6 hr or 12 hr. The amount I choose depends on how sunny it is outside. If it’s super sunny, just three hours. Rainy, cloudy weather and they get the full day with the lamps on. It’s super easy to use, and requires barely any effort on my part – I just hit a button each morning and my plants love me for it!

rainbow, grow lamps, succulents, grow light

Plant lady tip –

Download the app ‘GardenAnswers‘ to help you identify plants. (It’s free!) You simply take a photo of your plant and it will try to match it to plants in their database. Knowing what you actually have is obviously super helpful in properly taking care of your babies!!

house plants, grow light, purple lamp

All in all, thirty bucks well spent on this grow lamp. My plants are so much happier with the extra light they’re receiving these days. I’m even thinking about picking up a second lamp for some of my other plants. I highly recommend considering an extra light source for your plants, especially with the days getting shorter and shorter as the seasons change.
xoxo

Save

0 FacebookTwitterPinterestTumblrRedditEmail

Propagating Succulents 101

by Kaylah Stroup September 3, 2015

I haven’t been propagating succulents all that long but I’ve already learned quiet a bit and seen a great deal of success. Nearly every time I post photos of my babies on Instagram (…which is quite often) someone asks for help or exclaims frustration in their failed attempts to propagate. Propagation is incredibly simple once you know what you’re doing and it’s wildly satisfying! Today I’m going to share my method and a few tips that have helped me along the way.

Above left : Properly removed leaf

Above is the perfect example of a plant that has gotten leggy due to lack of sunlight, and is in prime condition to propagate. I went to my favorite local garden center specifically to find a plant for this post. This one had already begun dropping it’s leaves and growing pups in the container.

What you’re going to do is remove the leaves. It’s very important to remove them properly. I genetly twist them from side to side, holding near the base. You’ll feel a little snap when it comes off. You need to be careful not to rip the leaf or else it will not grow. There should be no piece of the leaf left on the stem. When I first started that’s what I was most nervous about; removing my first leaf. It’s really simple and after your first one it’ll be easy peasy!

Below :  Improperly removed leaf that will not grow

Remove all leaves that are a great distance apart from each other. After that you’ll be left with a pretty little rosette on a long stem. Your rosette may be made up of just three little tiny leaves, or a handful of larger ones it all just depends on the condition of your plant – either way it’s worth saving. Chop those bad boys off using sharp scissors, leaving an inch or so of stem. You’ll be able to plant them later.

Now you need somewhere to put all your leaves. I use a cake pan. It’s what I had on hand and it worked! I would never recommend something that doesn’t have holes in the bottom for your plants but because you’ll never actually be thoroughly watering the leaves or pups it doesn’t really matter. I fill the pan with cactus soil and perlite. (both of which can be found at Lowes, Home Depot or any garden center) I use approximately a 2:1 ratio. The perlite is important because it helps loosen the soil, and prevent compacting which helps with new root growth.

I lay out the leaves, and rosettes with the short stems on the soil/perlite mix and leave them alone for a couple days. The ends need to callous over or else they’ll absorb too much water and rot. After a few days I start spraying them with a squirt bottle. They don’t need much at all, just a quick mist. I do this daily. There are no hard and fast rules about watering your plants though. The best thing you can do is keep a close eye on them. Check on them every day, if they look dry, mist them. If not, leave them alone. Keep in mind that leaves without pups need less water than those showing growth.

They’re going to need lots of light to grow. Depending on your climate and your home just having your pan of leaves near a window should be sufficient. Leaves and the baby plants you’ll be growing are delicate; too much sun may burn them. After getting fairly comfortable with propagation I moved my babies outside where they receive maybe three or four hours of direct sunlight every day and they’re thriving. I wouldn’t recommend direct sunlight when you’re first starting out though. Start by a window that receives lots of natural light during the day.

Now it’s time to wait. Patience is important here! It’ll take a few weeks, some plants take waaaay longer than others, but eventually you’ll start to see growth. Keep misting regularly! The mother leaf will start to shrivel. I never remove it, I just let it shrivel up completely but if you do decide to remove it once you have decent sized new growth be sure not to accidentally rip off the roots.

When my new plants have grown to about the size in the photo above that’s when I start replanting them. They’re still very delicate and will need misted often. When replanting I use 3:1 or 4:1 cactus to perlite mixture. With ample water and sunlight your new babies should continue to thrive!

Everything in focus below is something I propagated myself

Tips for propagation success!
▴ SPRAY BOTTLE. Buy one, use it, be amazed! No, but seriously, you need one. If you try to just water your leaves and cuttings as you would a regular plant you’ll most likely drown them.

▴Don’t forget about the stem from your plant you took the cuttings from, that will produce new growth as well! Since it already has established roots it will produce growth much faster.

Growth on the stem after a few weeks
Growth on the stem after four months

▴ I once read “If it looks like a plant, plant it” and that tip has been invaluable. It seems so obvious now that I have an idea of what I’m doing with plants but as a beginner it completely opened my eyes to everything that I could propagate. Below is an example of something that I would have never thought to do anything with. That cactus is now what I would consider a mother plant, every time she produces new growth like the two bunny ears shown in the photos I remove them to make new plants. I’ve had nothing but success with that cactus and the pups, they root beautifully! This is a very general rule but if you can twist it off, like the leaves of succulents, you can grow it.

If it looks like a plant, plant it.

While researching propagation before I started I noticed that nearly everyone had a slightly different method, varying most when it came what to do after the leaves have calloused over. I decided to just do a mix of everything I read. It works wonderfully for me. If my method doesn’t work for you I definitely suggest doing more research. Don’t give up after one failed attempt! Propagation is WAY too much fun. You’ll be amazed how proud you can be of one tiny plant.

Good luck!
xoxo


To see more photos of my plant collection browse the “plants” tag or follow me on instagram.

Save

Save

Save

0 FacebookTwitterPinterestTumblrRedditEmail
Newer Posts
Older Posts

About Me

About Me

Hello!

I'm Kaylah! Renovating a 150-year-old home in Northeast Ohio. Likely found in my garden.

Categories

  • all the posts!
  • animals + nature
  • beauty, fashion + hair
  • explore everywhere
    • abandoned
    • cemeteries
  • plants + gardening
  • reviews
    • books
  • some of my favorite posts
  • stroup mansion
  • window shopping

disclosure

click to drop down
The Dainty Squid is a for profit blog. and we participate in a number of affiliate programs meaning, at no additional cost to you, I will earn a commission if you choose to make a purchase through one of those links. For more details click here

psssst! while you're here, check out my stained glass. Dainty Squid stained glass

copyright 2026 the dainty squid / kaylah stroup. please contact me about photo usage.


Back To Top
THE DAINTY SQUID
  • blog
    • all the posts!
    • stroup mansion
    • some of my favorite posts
    • plants + gardening
    • beauty, fashion + hair
    • reviews
    • window shopping
    • explore everywhere
  • about me
  • contact
  • shop