THE DAINTY SQUID
  • blog
    • all the posts!
    • stroup mansion
    • some of my favorite posts
    • plants + gardening
    • beauty, fashion + hair
    • reviews
    • window shopping
    • explore everywhere
  • about me
  • contact
  • shop
Category:

plants + gardening

propagating roses

by Kaylah Stroup March 29, 2023

fresh and lovely roses from my husband, Feb 15th.

I accidentally started propagating some roses.

If you’ve followed me on social media for any amount of time, you probably know that I am no stranger to propagating plants. I might even venture to say it’s one of my favorite hobbies. I love taking one plant and making multiples. It’s a thrill for a cheapskate like me!

This is a first for me though. My Valentine’s Day roses from Jeff took a very long time to start to look ugly. They were on my mantle for nearly a month before I deemed them “too far gone”. When I finally got up to throw them away I noticed that they seemed to be growing.

March 15th

While I am fairly confident propagating almost anything, I don’t have the best track record with roses. Our first summer here, when my dad let me go absolutely ham in my late mother’s garden, I tried to propagate some cuttings from her rose bushes. I followed the tutorials I found online to a T. Alas, they just died. I haven’t tried again since – until now!

I did a bit more research on growing roses from store bought cut stems. The verdict seems to be that they will have trouble rooting or may not grow as strong as roses that weren’t specially bred for cut flowers. You know what though? I’m feeling hopeful. These bad boys are growing at a really impressive rate! Plus, what’s to lose if they don’t grow?!

Part of me wants to split them up, putting half in dirt and leaving the other half in water to see if that makes any difference. They seem to be doing so well exactly as is though so I’ll most likely leave them to it. Do ya thang, roses!

I wrote that above, grabbed the roses to get a few updated photos and promptly separated them to experiment. LOL, whoops. I ended up cutting away the dead flowers and divided them up into three different containers. One is on my mantle where the vase originally was. A second container is in the window so that it gets a lot more light. The third is in my mini greenhouse that I start seeds in. We’ll see if that boost in humidity seems to push them along any faster. Each is still only in water though. Water propagation always seems to work best for me. Anyway, now I’m happy to let them do their thang without any interruptions from me.

March 27th

I’m really excited about this little experiment. If you never hear of it again from me, chances are they just died but hopefully I’ll be able to share some photos of a tiny rose bushes sometime this summer. Cross your fingers for me. xo

2 FacebookTwitterPinterestTumblrRedditThreadsBlueskyEmail

wet specimen rose

by Kaylah Stroup June 16, 2022

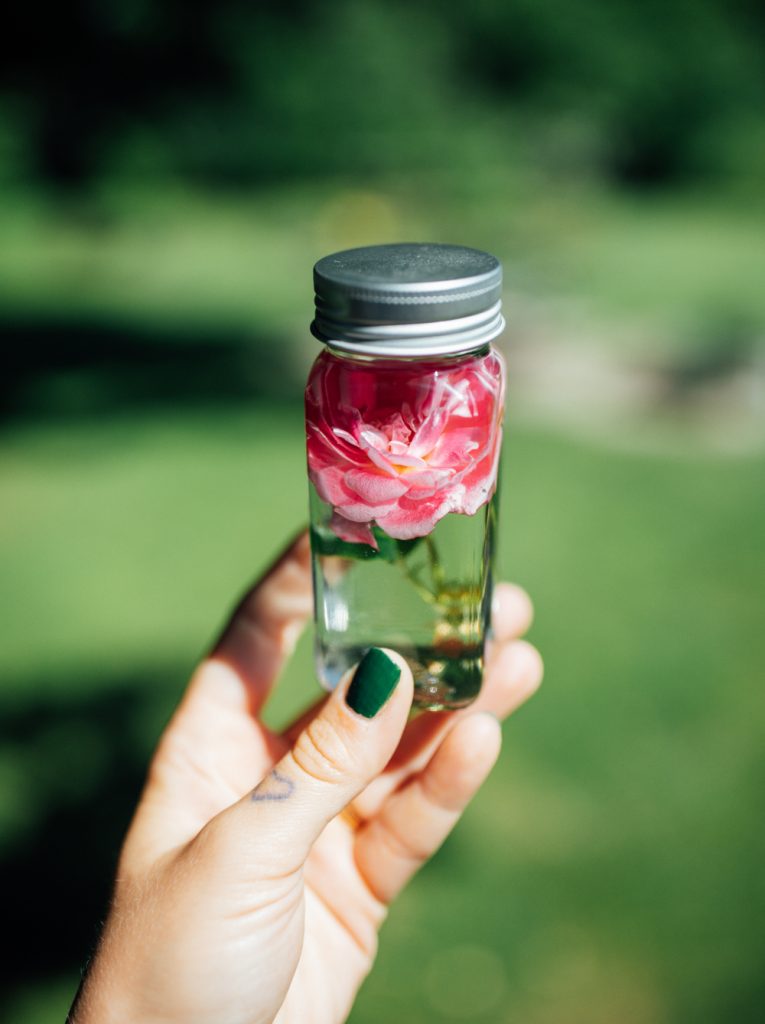
Inspired by my pal Mickey, I decided to make a wet specimen from a rose out of my garden. This isn’t my first foray into the world of wet specimens. (This post is from ages ago but *ahem* you can see another wet specimen I made.) This was my first time ever trying to preserve a flower in isopropyl alcohol though! My dad gifted me this rose bush last spring so it felt like the perfect ‘very special thing’ to experiment with preserving.

Press play to watch the video below to see how it turned out.

View this post on Instagram

A post shared by kaylah stroup 💀 (@thedaintysquid)

I certainly wasn’t expecting the color to drain that fast! It’s hauntingly beautiful, right?! I’m so excited to change out the alcohol in a few weeks for some fresh stuff. I’m already daydreaming about a shelf full of wet specimen treasures from my garden!

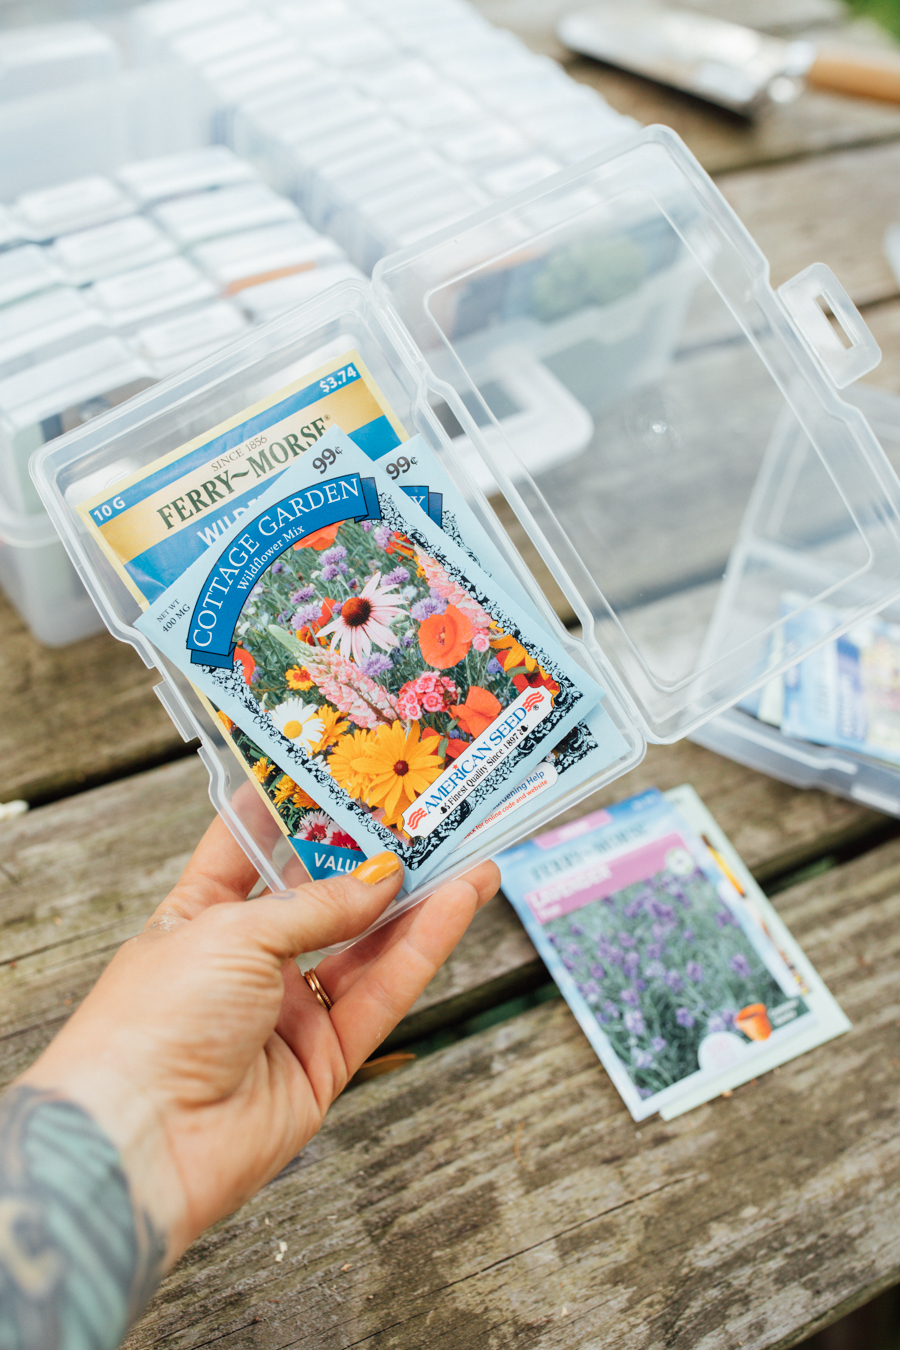
If you want to try making a wet specimen flower for yourself, all you need is 70% isopropyl alcohol, a glass jar with a lid, and flowers of your choice! Tag me @thedaintysquid if you post any photos of what you make! xoxo

0 FacebookTwitterPinterestTumblrRedditThreadsBlueskyEmail

my first tomato focaccia

by Kaylah Stroup October 15, 2021

This year I grew tomatoes for the first time. I mean, I grew A LOT of tomatoes. I didn’t have the best luck with larger varieties but my cherry tomatoes were a major success. I have eaten more tomatoes in the past three months than I have in my whole life. My favorite way to eat them is to roast them in oven with salt, pepper, olive oil and a boat load of garlic. Cooked up like that they’re literally perfect on everything.

On instagram I had been seeing photos of people’s beautiful focaccia art. I had never even had focaccia but I understood that it was some sort of bread-y thing that I could dress up any way I’d like. Seemed like the perfect way to use up tomatoes!

I followed this recipe. It’s not all that quick, requires some kneading and rise time. It’s enough work to make you feel like you’ve really accomplished something when you finally get to sink your teeth into it but easy enough that you basically can’t mess it up!

It turned out PERFECT.

ready to bake!

fresh out of the oven!

I hesitated sharing about my first focaccia here on the blog because it’s already been a few weeks and I guess I can see how it’s not really a big deal but you guys, I was SO excited about this darn thing. This year I’ve done more experimenting in the kitchen with things I’ve grown than ever before. (See: blackberry cobbler) It’s so satisfying. Gardening can be extremely frustrating and overwhelming but when things go right it’s truly the best. It brings me so much joy to know that I grew nearly everything in that meal. The tomatoes! The peppers! The onion! Right down to the herbs, those came from my garden.

Since this first one, I’ve made one each week! I’m obsessed. Each one has been better than the last as I learn what flavors I really like to lean in to. It’s been an awesome way to use up tomatoes but I’m also looking forward to experimenting with more artsy versions once my tomatoes are done for the season.

0 FacebookTwitterPinterestTumblrRedditThreadsBlueskyEmail

2021 pumpkin patch

by Kaylah Stroup September 30, 2021

Our first summer at Stroup Mansion! What a magical summer it was. JK. I didn’t have the most fun. It was hot… and wet… and mosquito-y. I had grand plans of spending the whole season in the garden but honestly, all the beds I made in the spring were basically ignored for a few months while I hid from mosquitos in the house.

Spring was amazing and thankfully, fall is looking like it’ll be just as dreamy! I’m finally able to be back outside in my gardens, enjoying all the hard work I put in earlier in the year.

I made myself three main beds back in early spring. There is my large flower garden, a rose bed, and a fairly sizeable kidney bean-shaped bed which I really had no formal plans for. That bed kind of became a catch-all. Anytime I stumbled upon a cool plant that didn’t fit in my flower bed vision or somewhere else around the yard, it went into that bed.

I had read that the best time to plant pumpkins was early June so that they’d be ready in time for Halloween. It just happened to be around that time that I had the realization there was no way I’d be able to afford to buy plants to fill that bed. Not to mention the fact that I didn’t want to rush into filling it with perennials just to get it done. My dad had given me a bunch of miscellaneous gourd, pumpkin, and squash seeds he’d saved so that felt like a great place to throw those. They’d keep the bed intact so that it wouldn’t become overrun with weeds. (Listen, I ain’t weeding an empty bed. I needed the motivation of something actually being planted in it!)

All that to say, what was just a way to use up some seeds and fill space ended up being one of my favorite things to grow!

I get so much joy from walking around my pumpkin patch each morning, scanning for new growth. It’s wild how easy they are to miss in the mess of all the leaves. That large white pumpkin in the middle? I didn’t see that until I did one last pass of the garden before taking these photos! It’s the largest one I grew and yet somehow I never noticed it!

I’m very much looking forward to going wild with this next year! I’ve been hunting down varieties I’d like to add to my mix. (Y’all have you seen black pumpkins!?!) I’ve even been researching growing them on a trellis instead of letting them run wild in my yard. I just can’t wait to at least double what I grew this year.

I think a lot of the satisfaction in these does come from the fact that I just didn’t enjoy my gardens for a few months and yet was still rewarded with these precious little things waiting on me when I decided to emerge. Feels like such a sweet fall treat.

If I didn’t love tiny pumpkins, gourds, and squash before (I definitely did) I sure do now!

outfit details
sweater
turtleneck
jeans
boots

0 FacebookTwitterPinterestTumblrRedditThreadsBlueskyEmail

lunch – a photo series

by Kaylah Stroup September 23, 2021

Taking full advantage of the end of summer, I headed to Lowe’s to check out their clearance perennials. I scored a handful of plants that don’t look so great today but will be beautiful again come spring. I also found a small pal to bring home, a praying mantis!

I placed him in my garden and got to work planting my clearance scores. Afterwards, I ran into the house, grabbed my macro lens and set out to get a few glamour shots. What I captured might just be my favorite photo series of insects that I’ve ever shot.

Shot with a Canon 7D mark ii and a Canon 100mm f/2.8 macro lens.

2 FacebookTwitterPinterestTumblrRedditThreadsBlueskyEmail

Mom’s daylilies

by Kaylah Stroup July 14, 2021

Some of the very first additions to the beautiful garden I started this year were plants dug up from my late mother’s garden. There was nothing I was wildly excited about at the time. The things I brought home to my garden, I grabbed simply because they had belonged to my mom. I knew no matter what, I’d end up loving them but when the irises bloomed I realized I had underestimated just how important these plants would be to me.

Out of the handful of carloads packed with her flowers, these daylilies were honestly what I was least excited about. I had even considered putting them elsewhere in the yard because I wasn’t sure I’d want them in my flower garden. Once again though, the second they bloomed they moved straight up to the top of my favorites list. Each day more flowers open. It’s a wonderful sight.

I honestly don’t really have much more to say than that. I just wanted to share some photos of this special moment. Hopefully this is the first of many years of blooms. I hope that her plants can continue to grow and multiply in my yard so I can divide them and pass them on to folks I love.

Gardening is magic. ✨

0 FacebookTwitterPinterestTumblrRedditThreadsBlueskyEmail

upcycled planter boxes

by Kaylah Stroup July 6, 2021
fiber glass tub

Shortly after we moved in, we discovered two giant fiberglass tubs (along with a boatload of other trash) behind our garage. The idea popped into my head almost immediately, I wanted to make them into planters!

The plan had been to cover them in wood somehow but soaring lumber prices and the fact that I always have about five hundred other projects going on meant that my beds just kept getting pushed to the back burner.

Recently though, I managed to score some free wood. We set aside some pieces for other things around the house, and the rest went to my little planter project!

I didn’t really have much of a vision for this project, just that it needed to be covered in wood. I didn’t want to see any part of the fiberglass tub. Luckily my dad was a huge help and absolutely nailed the design.

We made two since that’s how many tubs there were. The first was kind of an experiment. He led the way and showed me what to do. The second one though? We cranked it out in record time. It felt really good. DIY projects of this nature and power tools, in general, are still fairly new to me so when things just go hella smooth like this it feels damn good. The feeling of confidence that comes along with actually understanding a project and being able to do huge chunks of it on my own is wonderful.

I’m capable of many, many things. Things that I don’t even realize yet! That being said, it really helps to have such a handy dad to show me the way! I’m sure I could have done this completely on my own but it probably would have taken a heck of a lot longer.

DIY raised bed upcycle

After cutting and assembling, I sanded them down, carried them outside (holy smokes, yes, they are heavy!), and stained them. Before putting the top piece on, I lined the tubs with landscaping fabric to give me a bit of separation from the fiberglass.

Finally, I filled them with dirt and planted! One contains two types of radishes, as well as red onions. In the other, I planted a few of my tomato seedlings, basil and some marigolds.

I have them sitting on a big concrete pad that is in our yard. My plan for this pad has always been, literally since the second I saw it, to build a greenhouse here. Alas, those darn lumber prices have put a hitch in my giddy-up. For now, it’s the perfect spot for a few raised beds and our picnic table. It may not be the greenhouse I’ve been dreaming of but it’s still a cute little spot to grow plants!

raised bed DIY

Klaus LOVES looking at what’s going in the beds.

my first radish

Only seems right to include a photo of my first radish!

0 FacebookTwitterPinterestTumblrRedditThreadsBlueskyEmail

20+ cute planters (that won’t break the bank!)

by Kaylah Stroup June 29, 2021

this post contains affiliate links.

black planter (comes in a set of three!) // white planter (comes in a set of five!)

With over one hundred house plants in my collection, hunting down cute planters has become a sport to me. I am constantly on the lookout for snazzy pots to add to my collection! Here are a handful that are already around my house and some I’ve got on my wishlist. Nothing on this list is over $50.

  1. set of three speckled planters
  2. matte black planter
  3. black + speckled tan planter – set of two
  4. white drip planter
  5. black + white raindrops – set of two
  6. striped planter trio
  7. smoked white planter – set of two
  8. terracotta pots with legs – set of two
  9. pink terracotta planters – set of two
moon face planter
moon face planter
butt planter
butt planter // planters with tiny legs (a set of three!)
cute planter round up!
  1. beaded planter
  2. two-tone geometric planter
  3. unglazed terracotta planter – set of two
  4. white and gold planter – set of two
  5. footed planter
  6. embossed planter
  7. dotted planter – set of two
  8. trio of pots with metal stands
simple black planter (set of five!)
tooth shaped planter
tooth planter

Remember, drainage is essential! Most of the planters shown in this post already have drainage holes but if you end up with one without, it’s super easy to drill your own. Check out my how to drill holes in planters tutorial.

Still not satisfied?

3 FacebookTwitterPinterestTumblrRedditThreadsBlueskyEmail

easy seed organization!

by Kaylah Stroup June 17, 2021

this post contains affiliate links.

how to organize seeds
Teva flatorms for LIFE!

If you’ve been following me for a while, my head-first dive into gardening this year probably isn’t much of a surprise. Now that I have a yard of my own, gardening basically consumes my every thought! I am HOOKED.

Early in the year, I started purchasing seeds to start indoors. (I bought this little greenhouse. HIGHLY recommended. Makes such a big difference when starting seeds indoors.) At first, just storing the individual seed packets inside a tote bag was fine. The more seeds I collected, the more I realized that organizing them would be essential if I didn’t want to waste fifteen minutes sorting through seed packets every single time I wanted to find one specific thing.

seed organizer

After a quick search, I ended up finding this photo organizer. Sixteen four by six containers that all fit neatly into one larger box. It is PERFECT for organizing my seeds. Half of the containers are for my flower seeds and the other half for my veggies. From there, I have them grouped by other categories such as perennials or tomatoes. (Gosh, I have so many tomato seeds! I can’t help it!)

Knowing exactly where each kind of seed is stored makes it so much easier to see what I have and make sure it gets in the ground at the right time. It helps prevent me from accidentally repurchasing things I own. (Do you know how many times I ordered radish seeds because I kept not being able to find them when I’d look? Too many.) It’s also super easy to store when I don’t need it and tote it out to the garden when I’m ready to plant! Honestly, can’t recommend it enough!

I feel like this organizer plus a couple packets of seeds would make the perfect gift for a budding gardener or new homeowner!

Perfect gardening shirt from RedBubble. Check out some of my faves here + don’t forget to use code ‘RBC-G21-thedaintysquid’ for 15% off.

Happy gardening! xoxo

0 FacebookTwitterPinterestTumblrRedditThreadsBlueskyEmail
Newer Posts
Older Posts

About Me

About Me

Hello!

I'm Kaylah! Renovating a 150-year-old home in Northeast Ohio. Likely found in my garden.

Categories

  • all the posts!
  • animals + nature
  • beauty, fashion + hair
  • explore everywhere
    • abandoned
    • cemeteries
  • plants + gardening
  • reviews
    • books
  • some of my favorite posts
  • stroup mansion
  • window shopping

recent reads

disclosure

click to drop down
The Dainty Squid is a for profit blog. and we participate in a number of affiliate programs meaning, at no additional cost to you, I will earn a commission if you choose to make a purchase through one of those links. For more details click here

copyright 2025 the dainty squid / kaylah stroup. please contact me about photo usage.


Back To Top
THE DAINTY SQUID
  • blog
    • all the posts!
    • stroup mansion
    • some of my favorite posts
    • plants + gardening
    • beauty, fashion + hair
    • reviews
    • window shopping
    • explore everywhere
  • about me
  • contact
  • shop