THE DAINTY SQUID
  • blog
    • all the posts!
    • stroup mansion
    • some of my favorite posts
    • plants + gardening
    • beauty, fashion + hair
    • reviews
    • window shopping
    • explore everywhere
  • about me
  • contact
  • shop
Tag:

reviews

Digit review – an update

by Kaylah Stroup May 17, 2018

Digit Review

2024 UPDATE: Digit is now called Oportun. I’m leaving this review as is though because I still stand by it. All these years later, I’m still using the app.

Back in November of 2016, I wrote a review on a money saving app that I had been using at the time for a few months, Digit. Over the last year and a half, I’ve gotten a handful of requests for an update, most asking ‘are you still using the app?’ and ‘do you still love it?’ Short answer to both questions – HECK YES. It’s been an invaluable service to me, one I think more people should know about! So, I’m back today with some more of my thoughts on Digit.

First, let’s start with what Digit is…

Digit is a money saving app. It’s very, very straightforward and takes no time at all to set up. You simply connect Digit to your bank account, it checks your spending habits and if you can afford it, takes a little bit out of your account to save. How often they save depends on your “unique financial situation” but the average is 2-3 times per week. The amount also varies. Their FAQ says the average is $10-30 which from my experience sounds about right. Although there have definitely been times it’s taken as little as fourteen cents! Every penny counts.

There isn’t much to do or see in the app, other than how much you’ve saved but what else do you need? If you feel it’s taking too much money from your account you can type “save less” or if you’d like it to take more type “save more”. You never have to worry about Digit taking more than you can afford though since they analyze your spending to see what you can afford to save. They even have a no-overdraft guarantee! They’ve never transferred more than they should have from me. Toward the end of each month, when my bills are due Digit lets me know it won’t be saving much because I “have some expenses coming up”.

Digit is free to use for the first 30 days, after that its $2.99 a month. I’ve been using them since before this price was implemented so when they sent out the “hey, we’re gonna start charging” email I was definitely disappointed. I considered deleting my account but it’s undoubtedly worth the subscription cost!

When you save for three consecutive months Digit will automatically reward you with a 1% annualized savings bonus. It’s not a ton (unless of course, you’re saving a ton) but free money is free money!

I’ve saved… A LOT.

In the nearly two years I’ve been using Digit I’ve saved thousands of dollars. Not exaggerating here. Money that I know for a fact I would have just spent on stupid odds and ends at Target had it not been out of my bank account. Money I definitely wouldn’t have saved otherwise! I am not great at saving my own money. I have a savings account which I add to but it’s just too easy to transfer that money right back into checking. Although transferring money back into my account from Digit is super easy and only takes one day, the seperation is enough to make me reconsider any unnecessary purchasing.

Something I think that’s really neat is you can set up ‘goals’ in the app. So instead of all the money it saves you being shown as one total, you can make separate savings goals. For instance, I have the one it sets up automatically ‘rainy day’ as well as ‘honeymoon’, ‘roadtrip’, ‘taxes’, and ‘oh crap’. It saves separate amounts for each of those goals which really helps me see what I have and act accordingly. Instead of being tempted to take out all of my savings in Digit when we go on a roadtrip I know that I have X amount of dollars that I have set aside specifically for this while not cutting into money I need to be saving for my quarterly tax estimates.

So, what do I use Digit for?

Obviously, I use it to save money but I have a few examples of times it really came in handy. My earlobe reconstruction? It wasn’t cheap but I had saved the money in Digit so I was able to do it without stressin’. My car needed a fairly costly repair a while back, I just pulled the money from Digit! I was even able to buy a wedding dress and book the florist with money I had saved in Digit.


Final thoughts.

If I had to choose my top five apps on my phone, Digit would easily make the cut! If you’ve ever wished you were better at saving money or wondered how to easily save for a trip/that camera/those shoes – this is the app for you! Other than the $2.99 subscription price (which like I said – is totally worth it) I can’t think of a single downside! I highly, highly recommend giving it a whirl! I mean, who wouldn’t benefit from saving a bit more!?
xoxo

0 FacebookTwitterPinterestTumblrRedditEmail

babbleboxx unboxing – her health month

by Kaylah Stroup May 8, 2018

This post is sponsored by BabbleBoxx.com.
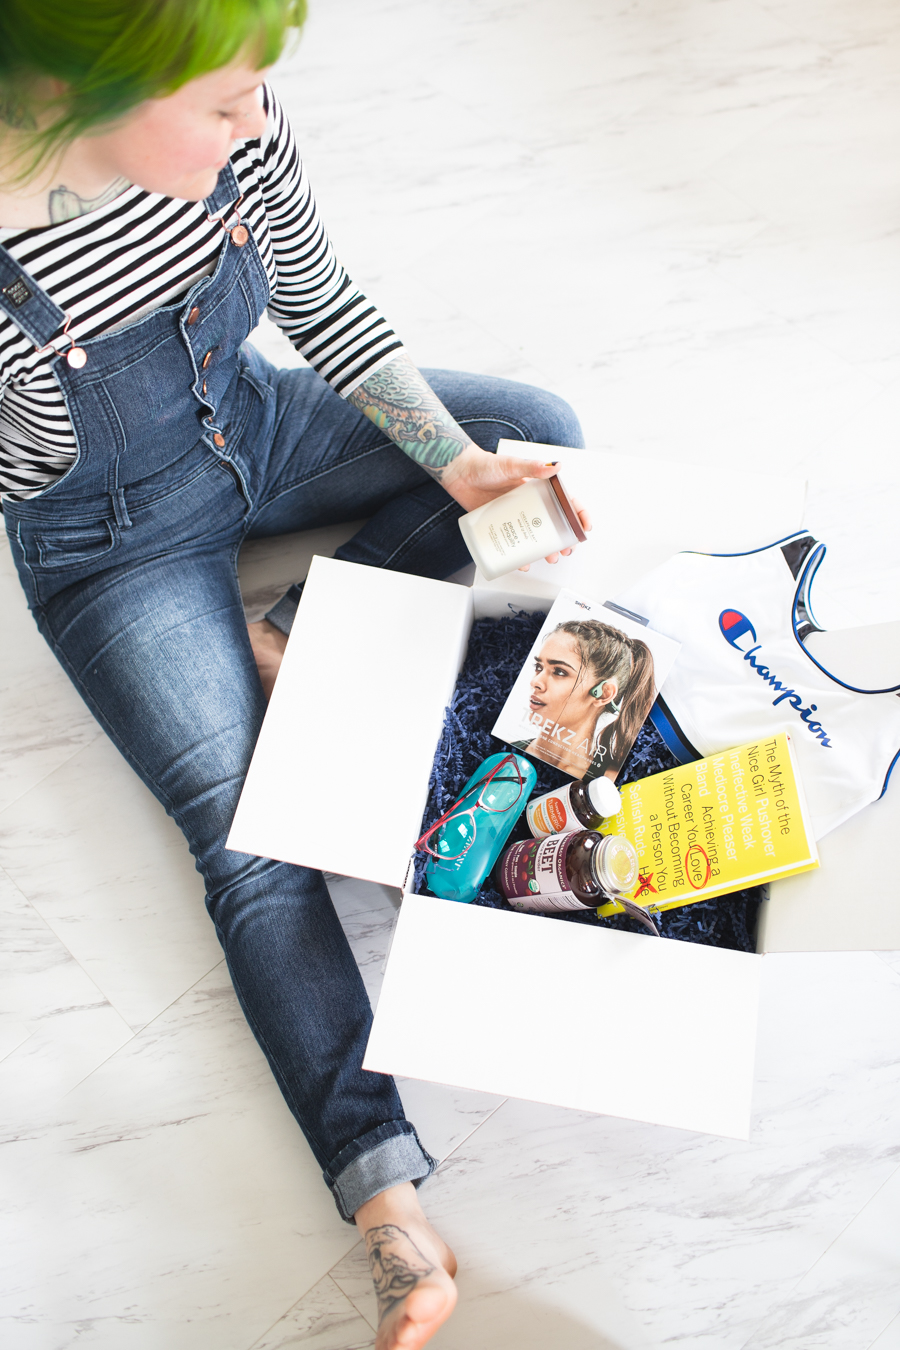
BabbleBoxx is a curated sample box that gets sent to influencers. Last week I got my very first one, and the theme couldn’t have been more perfect* for me right now. May is Women’s Health Month, the box was themed accordingly.

It works out wonderfully because I am feeling more inspired than ever to get my body moving before the wedding next month. I’m not necessarily trying to change the way I look, just trying to feel better and be stronger. I made it my goal to move more and really take care of myself this month. My box was full of items to help me do that a little bit better.

Inside my BabbleBox was…

▴ Zenni UV Blue Blockers. If you haven’t heard of them yet, Zenni offers prescription glasses online for a really great price. In this box I received a pair of their blue blocker glasses which help block blue light. Too much blue light exposure can cause tired eyes, headaches, and blurred vision. (Literally all problems I have from staring at my computer all day long!) I haven’t been wearing them long enough to notice a difference but I’m excited to see if they help.

Aside from that, the pair I received are super cute! When I opened them I thought they’d definitely be too small but to my surprise they look adorable. Probably doesn’t hurt that they’re hot pink!!

Obviously, it goes without saying, if you’re in the market for new glasses keep Zenni in mind. Their prices are super affordable and they have lots of great styles. I’ve got my eyes on this pair. Just waiting until I get an updated prescription in a month and then I’ll definitely be grabbing some!

▴ The Myth Of A Nice Girl by Fran Hauser. Described as ‘A candid guide for ambitious women who want to succeed without losing themselves in the process.’ It has really great reviews (nearly all five stars on Amazon!) I’m always down read a book about female empowerment! I haven’t had a chance to read this yet, I’m saving it for our flight, but I am super excited to start!

▴ Champion Absolute Mesh Sports Bra. Moisture wicking + compression for moderate support! I actually think this might be my first compression sports bra and holy smokes, it feels amazing. So much more comfortable to jog in than anything else I own.

Fits true to size. (I’m wearing a large.)

▴ AfterShokz: Trekz Air. Not going to lie, when I saw headphones in the box I wasn’t too jazzed. I hate sticking things in my ears and I also don’t like feeling cut off from the world. These don’t go in your ears though, and they don’t sit on top of them either (something else I’ve always thought was uncomfortable.) The Trekz Air headphones are open ear headphones which means they deliver music through your cheekbones. They’re amazing; lightweight, super comfortable, great sound. I’m hooked! I never thought I could like headphone this much. I’ve really been digging these while on my daily walks with Klaus!

PS You can get $30 off your Trekz Air until June 30th with code KAYLAH30.

▴ Chesapeake Bay Candle: Mind & Body (in peace + tranquility.) I love candles. Period. If I’m home, there’s at least one burning. I’ve been through so many of them I consider myself a bit of a connoisseur so please don’t take it lightly when I say this one has worked it’s way into my top five. It smells so clean, and so fresh. I have it sitting on my desk beside me, the window is open blowing in a warm breeze and multiple times I’ve thought “goodness, the spring air smells so lovely” only to realize nope, that’s the candle! Soy wax blend candles, poured in the USA, infused with natural essential oils – what could be better!?

There are a handful of other scents from Chesapeake Bay’s Mind & Body line aaaand I think it goes without saying I need to try them all, especially since they’re so affordable.

▴ Pure Synergy: Organic Beet Juice Powder & Turmeric Extract. Jeff watched me as I opened this box and the second he saw the beet juce powder he was all “Oh man! Beet juice! So good for you!!!” Beet juice powder supports a healthy heart and circulatory system as well as healthy liver function. I’ve been putting a little bit in my orange juice each morning. It’s pretty darn tasty.

Tumeric Extract is great for great for after workout healing of inflamed muscles. It also helps with cognitive function and healthy digestion as well as a laundry list of other things. It comes in pill form so it’s been easy for me to remember to take it every day. Feels good to be proactive!

15% discount with code: PureSynergyPartner


Have you tried any of these items? I think my favorite have to be those headphones. Seriously such a smart + safe product to be able to listen to music while not making you oblivious to what’s going on around you.
xoxo

*Actually, I received a second box that I’ll be sharing more about on the blog in another week that was bridal themed. So clearly these two boxes put together are basically everything I need from here until the wedding!

0 FacebookTwitterPinterestTumblrRedditEmail

4 things I tried + loved in April

by Kaylah Stroup April 30, 2018

① Rose & Pomegranate Face Cream. I feel like I’m always on the hunt for the next best facial moisturizer. My purchase was swayed half by the packaging which I really like, and half by the incredible reviews this stuff has. I’ve been using it every morning before my make up and most evenings (ya know, when I’m not too sleepy to moisturize) It’s not heavy at all but still leaves my face feeling sufficiently moisturized which is a HUGE deal in the winter. It also has a very light rose scent which I really dig. It’s refreshing!

Unlike most the reviews, I don’t feel like it’s a miracle worker but I do really like the way it makes my skin feel. I would definitely recommend it to anyone on the hunt for something to leave their face feeling smooth and moisturized.

②  Wireless LED Puck Lights. So, for some reason I almost feel like the things I name in this series have to be beauty products buuut they don’t and they won’t all be. This month I purchased these LED puck lights for my curiosity cabinet… and I honestly wonder how the heck I went this long without them.

Four brightness settings, and a remote make them super easy to use, and adjust without ever opening up the glass doors. Since they came with adhesive stickers, I had them hanging and light up in no time at all.  They’re nothing fancy, and definitely wouldn’t be my first choice if I were looking to light a room but they put off the perfect amount of light to draw some attention to my collection. I absolutely love turning them on each evening. I’m already scheming where I can put more of these. Bookcase, maybe?

If you’re interested in getting some cool lights for your home, I highly recommend this post – fun lighting must haves! You know you need a toilet light!

③ NYX BB Cream in Nude. Another product I’m always on the hunt for the next best thing of – BB Cream! To be fair, I’ve never tried one I didn’t like but I really do love this one. It’s super light but still gives enough coverage to even out my skin color. It lasts all day and is pretty darn affordable. Really, it’s just an easy product to use. I love experimenting with make-up but for my every day routine I’m pretty simple, all I want is for my skin tone to be even. This stuff gets the job done wonderfully.

④ GlossyBox. I got not one but two GlossyBoxes this month!  The first was their standard monthly box, and the second was their limited edition mother’s day box. Both were incredible but I LOVED the mother’s day box. Every thing in it smelled magical. It was serious eye candy too. I unpacked and repacked the box so many times just because I loved touching and smelling everything. They’ll sell out quick, so if you want one hurry up and grab it!

Loved the regular monthly box too! I have mixed feelings about subscription boxes. I love experimenting but also really like being in control of my purchased so boxes like this are usually hit or miss with me. This was a hit! Out of the five products I received, two of them became part of my daily make-up routine. (The brow pencil + blush, in case you’re curious!)

My first impression of Glossybox is pretty high! Definitely something I wouldn’t mind continuing to try out.

Did you try anything awesome this last month?
xoxo

Check out three things I tried in March!

0 FacebookTwitterPinterestTumblrRedditEmail

a few of my favorite nail tools

by Kaylah Stroup April 16, 2018

▴ Seven-sided nail file. This file is numbered 1-7 on each different colored section. You simply go through the steps on each of your nails. After you’re done you’ll have beautiful, shiny nails ready to paint! Every few months, when I run out of files, I try to buy something else, and I always coming crawling riiiight back to this one. They don’t last terribly long but they are only file I feel really get the job done quickly and easily.

▴ Cuticle Oil. I think the biggest thing to having nice looking cuticles is keeping them moisturized. I’m currently using Butter London’s cuticle oil (seems like it might be an older product? I picked it up at TJ Maxx!) and Burt’s Bees Cuticle Cream interchangeably.  I apply a generous amount to my nails quite often… basically whenever I think to! I leave one in my office so I can massage my cuticles between emails, and another beside my bed to rub in while I fall asleep.

▴ Nail polish thinner. It’s a miracle worker! You just take an eye dropper (one you plan to designate to this purpose), suck up the thinner, and put a few drops into any nail polish that is getting thick, shake and then TA-DAAA, it’s like new…sometimes even better! I’ve used it multiple times on a few of my polishes and haven’t noticed any more chips or anything different than normal. Doesn’t even seem to effect dry time (other than making it better, of course. Thick nail polish dries SO slowly!) With this stuff you can rescue all your favorites that you were considering throwing away because they got thick.

▴ Seche Vite. My all-time top coat choice! Other top coats pale in comparison!!! It’s a great consistency, and dries oh-so-shiny. According to my Amazon history, it looks like I’ve been using Seche Vite for just over eight years. The only time I ever purchase a different top coat is when it’s a part of a ‘two step’ system, and even then I usually end up using Seche Vite as my ‘step two’ anyway. It’s a must!

▴ Seche Restore. Just like other nail polishes, Seche Vite can become too thick to use over time. I had found that my nail polish thinner of choice kind of ruined a lot of the things I really love so much about the top coat – namely the quick dry time. Then I discovered Seche Restore and all was right! I am totally not one of those people who thinks you need to use this product and that product together just because they’re by the same brand but in this case, Seche Restore really is the best thing you could put in your Seche Vite to maintain consistency.

▴ Dotting tool. Used to make polka dots, this baby is a must in my little basket of nail supplies. It has two sides, each a different size so you can make different size polka dots. It’s so much easier than a tooth pick for me because it’s larger and easier to hold on to plus the set I own and linked to comes with a variety of sizes.

▴ Scotch tape + nail stickers. My two not-so-secret weapons for awesome designs. Seriously, without these two things I’d probably just be painting each fingernail a different color instead of playing around with unique designs.

PS Check out this recent post for some tips on using nail stickers, as well as lots of inspiration! 

What are your nail essentials? 
xoxo

Check out loads of nail inspiration under the #kaylahsfancynails hashtag.
0 FacebookTwitterPinterestTumblrRedditEmail

nail sticker how to + FAQ

by Kaylah Stroup April 5, 2018

For about six years now I’ve been using nail stickers of some sort to get crisp lines in my nail art. They’ve played a huge part in developing my nail style. (That’s a thing right? I definitely feel like I have a style.) I couldn’t imagine not having them in my nail kit. Since I’ve been getting back into sharing my designs I thought I’d do a little post on my favorite tool of the trade! Under $7 and basically unlimited options – there’s no excuse not to give them a go!

First, a quick how-to!

① File, buff, wash then dry your nails!
② Paint base color.
③  Let it dry. No, really, let it dry. Not half dry or mostly dry. All the way dry!
④ Choose your sticker, place it on the top of your hand to get some of the sticky off, and then apply to your nail. Make sure to push it down firmly, especially in the corners of your nail where polish could seep under.
⑤ Paint your nail, and remove sticker immediately. Peel slowly, following the curve of the sticker.
⑥ Repeat on the rest of your nails. The order I find easiest is pinky, ring, middle then pinky, ring, middle on the other hand. Pointer finger from the first hand, pointer from the second and thumbs last. Thumbs are the only nails I do where I put the stickers on more than one nail at once. This way I’m able to really push down the sticker throughouly without messing up an already painted nail.
⑦ Finish it all off with a top coat. I recommend Seche Vite!

Q.  Nail stickers? So, it’s the whole design and I don’t have to do any painting?

A. No, they’re basically just stencils. I’ve found them to be way easier than using tape and you don’t have to do any cutting. If you’re bad at painting your nails or don’t have the patience to do fun designs, I recommend checking out Incoco nail polish appliques! 

Q. Are they reusable?

A. No, they are not. They’re one time use.

Q. The stickers are peeling up my nail polish when I take them off. What’s up with that?! 

A. Sounds like your polish might not be completely dry. I always suggest painting designs with the stickers in two separate days so you’re not rushed. Of course, you don’t have to wait a full day but at least give your polish an hour or so. I normally throw on my first color in the morning and finish with the stickers in the evening.

Q. My nails are completely dry but my base coat is still peeling off. What do I do? 

A. This could be one of a few things. 1. You have a crappy nail polish. I’m certainly not a nail polish snob, I will always snatch up a 99 cent polish but there are some that are just not made very well and these will peel up when the sticker is pulled off. 2. Your sticker is too sticky! Easy fix – put the sticker on the top of your (clean & dry) hand and peel off before placing on your nail. I actually recommend doing this all the time.

Q. The nail stickers are leaving a residue, what do I do?

A.  I’m not 100% sure why this happens, I’ve only had it happen a few times but it was before I started doing the trick of putting the sticker on your hand before your nail to remove some of the stickiness. If nothing else, wait for your polish to dry, and then go wash your hands with soap and water before applying the top coat. Sticky gunk comes right off.

Q. Why aren’t my lines as crisp as yours?

A. The trick to crisp lines with these stickers is peeling them off as soon as you’re done painting each nail. This means polishes that aren’t completely opaque on the first coat are far less superior when it comes to using the stickers. Once you start building layers you’re running the risk of making a mess.

So basically be patient, make sure each coat is COMPLETELY dry before putting down the sticker, and get yourself some great polish (I’m all about Sally Hansen & Zoya!) Set aside a little chunk of time to do your nails or do it over a period of a few days and with some practice you’ll be doing your nails like a pro!
xoxo

Find nail stickers here.
Check out loads of nail inspiration under the #kaylahsfancynails hashtag.
0 FacebookTwitterPinterestTumblrRedditEmail

3 things I tried in March

by Kaylah Stroup April 2, 2018

① Kind Natured lotion + foaming sugar scrub in coconut & monoi. Funny thing here is I bought these at two seperate stores not realizing I picked out the same scent until I got home. Based on the name alone this probably wouldn’t be a scent I’d buy online, I’m more likely to go with something I know I’m going to love, like lavender. I literally don’t think I have ever smelled a lotion this nice though. Not to mention it makes my skin so soft and smooth. I go through a lot of lotion in the cooler weather and using this stuff feels like pampering. It easily became my new favorite lotion. I would absolutely buy both of these again. I also look forward to trying more from Kind Natured.

② Dr. Jart+ Cicapair ™ Tiger Grass Color Correcting Treatment SPF 30. I read about this stuff on Allie’s blog, The Only Living Girl in New York. She doesn’t reguarly post about this sort of thing so I was definitely intriqued when she mentioned it. I started reading reviews… and I had to have it. It’s kind of expensive, in my opinion, so I opted for the travel sized container to start with.

It wasn’t love at first use. Don’t get me wrong, I liked it but wasn’t sure it was worth the price. There are lots of other options out there that help correct facial redness, and for a lot cheaper. After about a week though, I really figured out how it worked best on my skin. Thoroughly moisturizing then applying was the key. Now I’m hooked! This product helps reduce the redness I get along my chin and cheeks. I’ve never really thought I had pretty skin but in the last week I’ve caught myself admiring it more than once. When I mentioned it to Jeff he replied that he had thought my skin had been looking extra pretty lately as well! WIN!

I don’t like how expensive it is but honestly, that tiny container is going to last me a loooong time since it only takes bit to get results. I would definitely recommend giving it a spin if you have some facial redness you’d like to cover without feeling like you’re caked in make up. Sometimes I put it on before my foundation, other times I wear it alone. Either way it never feels heavy! It makes for an easy ‘no make up’ make up look. I have a feeling I’ll be relying on it a lot this summer.

③ ILNP Mega. I already featured this polish in my last nail round up but I didn’t share a photo of just how gorgeous it really is. I’m seriously obsessed. It’s pretty in any lighting but in the sun it’s honestly the most beautiful polish I have ever seen. So much movement of color!

It only takes two coats to get that level of opacity and it dries very quickly. Also worth noting, it comes off easily with regular nail polish remover. I have a habit of avoiding glitter polishes becuase they can be a pain to remove but this stuff is no problem at all!

I have five more from ILNP that I am just dying to try. That second one over in the photo above, Birefringence, is just killing me. I have it sitting beside my computer and I’m constantly twirling the bottle to watch the colors change. I’m hooked on ILNP. I can’t believe it took me this long to try them. They’re absolutely worth the price!

Did you try anything awesome last month?
xoxo

0 FacebookTwitterPinterestTumblrRedditEmail

apartment must have : a disco ball!

by Kaylah Stroup March 6, 2018

Last year I discovered the joy of rainbows in my apartment. Two suncatchers and some crystals hanging in the window means that when the sun is shining my apartment is filled with tiny rainbows. It’s nothing short of magic. Honestly, it’s one of my favorite things in the whole world. I had no idea silly little rainbows could make me so happy. You’d think after some amount of time they’d have lost their charm but I’m still just as amused by them as the first time I saw them.

I’ve known that set in direct sunlight a disco ball would be equally enchanting but I’d basically written them off because if there is one thing that doesn’t fit my decor style, it’s a disco ball! The suncatchers, and crystals I have in the windows are fairly inconspicuous. They’re small, and to be honest, I never really notice them. A disco ball, on the other hand, is a little bit harder to miss. I had no idea where I’d put it, how to display it, etc.

A few weeks ago, I couldn’t resist the appeal any longer. I bought an 8-inch mirror ball… and guess what! I should have done it so much sooner! The first day I put it out in the sunlight had me rapid fire texting Jeff “Oh my gosh, disco ball is life. This is the best thing everrrr!”

disco ball apartment, mirror ball light


So, how am I hiding the disco ball and making it fit my style a little bit better? Truth be told, I’m not.

Like I said, one of my biggest concerns with buying a mirror ball was where in the world it’d fit into my decor style. Well, it doesn’t but you guys, the light it throws off into the room makes me 100% not care at all what it looks like. Instead of hanging it somewhere or giving it a permanent home I’ve found the way to best utilize it is to move it from room to room as the sun moves through the sky.

In the morning, sunlight fills the kitchen which means the disco ball goes on the kitchen table. A little bit later in the day my living room is sunshine central, the ball goes on my table in there. Finally, in the evenings, sun comes in my office so I’ll bring the disco ball in there.

I’m well aware that what I just described sounds like a pain in the butt. If I had read that before buying it, I probably wouldn’t have been convinced. Obviously it’s not necessary to drag the disco ball from room to room but my point was that this thing I would consider kind of tacky looking doesn’t have to become a main piece of decoration in any one place. It does it’s job and then I move it.

Magical, right?!

I’m absolutely obsessed with all the fun things that happen here when the sun shines. Rainbows and specks of light covering the walls always bring a smile to my face. It’s one of the few things that is guaranteed to make me stop and just appreciate the moment. I think everyone could use something like that…

Everything else aside, if you have a cat and get direct sunlight in your home you should just go ahead and buy a mirrorball for your cat. Professor is OBSESSED. You should hear him chatter when this thing lights up the room.

You can read more about the rainbows filling my apartment + find lots more photos here.

Updated 8/17 – Still loving this, so much so that I purchased a 4-inch disco ball as well. This one I don’t move around, it has a permanent home on my pencil cactus. It obviously doesn’t throw as much light as the one twice it’s size but it’s still great! I’d definitly recommend picking up a smaller one if you aren’t sold on a big one that you move around your home.

0 FacebookTwitterPinterestTumblrRedditEmail

Okay fine, I’m grateful! – a book review

by Kaylah Stroup February 13, 2018

Okay fine, I'm grateful!

‘What I’ve been reading‘ posts have been few and far between here on The Dainty Squid. I just haven’t been making reading a priority lately. I dooo, however, have a book recommendation for you!

Something I really wanted to do this year was focus on the good. It sounds cheesy but honestly, it’s incredibly easy to just get hung up on the bad things in life. I can’t even count the number of times I’ve gotten home and immediately told Jeff about somebody driving poorly instead of the gorgeous sunset that I just witnessed. I want to change that. I feel like it takes a lot to rewire your brain to stop being so negative but I also think that it’s something worth working on – OF COURSE. All that to say, I recently decided I wanted create a habit of making little lists of good things.

Right after thinking about starting a gratitude journal I happened to stumble upon this one. The sassy cover roped me in. I bought it immediately. Obviously you don’t need a special book to write positive things in but I mean, it certainly doesn’t hurt. Plus once you find the perfect one, it makes you extra excited to get started, and actually keep up with your goal.

gratitude journal

The book has a brief introduction about how important having a gratitude journal is. Studies have even shown that having one has an impressive range of benefits such as better sleep, higher levels of positive emotions, acting with more generosity, feeling less loney… The list goes on!

After that you’ll find that the left side contains quotes and the right side is where you’ll do your writing. (TBH, I am not a quote person. I could not care less about this half of the book.) Each of the writing sections says “Why I’m grateful today, more or less:” and has fifteen lines for you to journal your little heart out. The top of the page has a small section for the date, and the bottom has little mood faces to choose from to record “today’s gratitude level”.

Clearly this book was made with the intention of you using each page as a seperate day but I’ve never really been huge on journaling. List making is more my style so I’ve been writing little positive highlights from each day in the following style:

1-22 found TWO plastic soldiers on the beach!
1-22 facetiming Jeff right as he facetimed me.
1-26 bike rides yelling ‘happy friday!’
1-27 being woken up with back rubs.
1-31 got my wedding dress – I look like a princess!!!
2-5 sunshine on snowy days.
2-10 DIY haircuts gone right.
2-11 sledding with the kids!

(Those are actual things I wrote in my book.)

It may not seem like much but taking the time to acknowledge those good moments is such a game changer! It forces you to look for the good, and being able to look back on your lists is seriously the best. I make an effort to write at least one thing every single day. Some days are easier than other but I’ve found that most of the time once I get started writing I just keep thinking of things.

I bought it in the smaller, perfectly purse-sized version so that it’d be easier to always keep around but it does come in a larger version as well.

Like I said before, totally something you could do just as effectively on any old piece of paper but if you’re looking for a special place to start a gratitiude journal, I highly recommend this book! And of course, I definitely recommend taking a few moments each day to just write down some positive things that happened if you’re not doing it already!
xoxo

0 FacebookTwitterPinterestTumblrRedditEmail

affordable + dyeable hair extensions!

by Kaylah Stroup February 6, 2018

affordable, dye-able hair extensions!

For nearly a year my list of beauty related things I wanted to try included extensions. The urge to buy them would come in waves. I would desperately ‘need’ them and spend hours researching then completely forget about them for a bit. My research was never really conclusive. Good extensions usually aren’t cheap and there are more than a few overly influenced looking reviews out there floating around the internet.

I finally decided to just go for it, and purchase a set a few month back so I thought I would give a little insight into what I bought, how to dye them to match your hair, and share what they look like…

green hair clip in extensions, hair dye extensions you can dye! hair extensions you can dye!

I purchased these 16″ clip in extensions in bleach blonde. It was important to me to purchase human hair so that I could style, wash, and most importantly, dye the extensions. This set came with six pieces which was more than enough for me. Honestly, what you need will be based on how thick your hair is and what you’re looking to acheive with the extensions. My hair is thin, and I wasn’t looking to add length – just volume. I actually very rarely wear all six pieces at once. It feels a little too over the top for me – too thick, too obvious.

How to dye your hair extensions –

Dyeing the hair was actually a huge reason I was so nervous about purchasing extensions. Come to find out, I definitely over thought this step. Since I purchased bleach blonde hair, all that needed to be done was for me to apply dye. I used Punky Colour in Alpine Green, the same color I use in my real hair. I simply ran it through the extensions with gloved hands and then set them down on a plastic bag for about an hour or so before rinsing with cold water. I let them air dry then they were ready to use.

One thing to consider when purchasing and dyeing extensions is the fact your hair color fades with each wash and you most likely won’t be washing your extensions even a fraction of the number of times. I’ve embraced the fact that my hair color is an ever-changing thing and I love all the different colors and tones my hair is at any given time. I think hair looks more natural, I mean as natural as green hair can be, when there are different levels of color going on. The fact that my extensions are always a slightly different color than my hair is actually desirable. I think this post perfectly illustrates how my extensions look in my hair as it changes color over time.

How to style your extensions –

There are a ton of videos on how to put in your clip on extensions so I won’t be covering that. (Honestly, just google it! So many youtubers cover this I couldn’t pick a favorite.) I do, however, want to mention that I put the extensions in while my hair is still straight. That way everything gets curled together giving me a more natural look.

Before styling I make sure to spritz them, along with my real hair, with a heat protecting spray. Since they are made of real hair they will get damaged if you aren’t protecting them.

affordable, dye-able hair extensions! how to dye hair extensions

left – with extensions / right – without — main hair color is Punky Spring Green

I was having trouble capturing a before and after photo that I felt accurately showed the difference of just my natural hair vs extensions. Of course, I could have shot some TV style comparisons where I look super gross and run down in the before and incredibly glamorous in the after but that isn’t what this is about. Think of hair extensions like make up, it’s fun to play with but not actually necessary. My hair is just fine without them but wearing extensions is a fun little change of pace. The difference isn’t wildly different but just enough to make you feel fab!

left – without extensions / right – with

extensions - before & after

the following photos in this post all include extensions.

green hair extensionshair extensions you can dye

I’m definitely no extension expert but in my short time experimenting I feel like I’ve learned a lot. By all means, if you have any questions, I’d be happy to try and answer!
xoxo

✨ You can find hair dye tips and guides in my hair master post. ✨
1 FacebookTwitterPinterestTumblrRedditEmail
Newer Posts
Older Posts

About Me

About Me

Hello!

I'm Kaylah! Renovating a 150-year-old home in Northeast Ohio. Likely found in my garden.

Categories

  • all the posts!
  • animals + nature
  • beauty, fashion + hair
  • explore everywhere
    • abandoned
    • cemeteries
  • plants + gardening
  • reviews
    • books
  • some of my favorite posts
  • stroup mansion
  • window shopping

disclosure

click to drop down
The Dainty Squid is a for profit blog. and we participate in a number of affiliate programs meaning, at no additional cost to you, I will earn a commission if you choose to make a purchase through one of those links. For more details click here

psssst! while you're here, check out my stained glass. Dainty Squid stained glass

copyright 2026 the dainty squid / kaylah stroup. please contact me about photo usage.


Back To Top
THE DAINTY SQUID
  • blog
    • all the posts!
    • stroup mansion
    • some of my favorite posts
    • plants + gardening
    • beauty, fashion + hair
    • reviews
    • window shopping
    • explore everywhere
  • about me
  • contact
  • shop