This post has been moved & updated. Check it out here.

This post has been moved & updated. Check it out here.


Hope you’re having a great start to your week!
xoxo


Cleaning skulls. Oh, what a topic! I’ve gone back and forth in my head a million times – is this something I should blog about? It’s one of my favorite hobbies, something I pride myself on knowing a lot about, and I definitely feel that I have information worth sharing but it’s a sensitive topic for a variety of reasons. Blogging about it I run the risk of scaring away readers who are offended, grossed out or simply just not interested. But like I mentioned above I have information I want to share. When I first started this hobby I had the hardest time finding answers to my questions. Even as a beginner there was a lot I read that I immediately could see was misinformation. I’ve learned so much just by trial and error.
I am an extremely visual person. I can gather more information from one photo than I can from a few paragraphs but because this can be such a graphic process I will not be sharing any photos of unfinished skulls. This just isn’t the place. I will share as much detail as possible though so if this isn’t your cup of tea, I suggest you scroll on right now. I’ll be back with your regularly scheduled programming tomorrow.
Obtaining skulls.
There are lots of different places to get skulls. My two main sources of skulls are the woods, I find them on hikes, and my dad’s friend from work. He hunts, and has no use for the heads so he sends them my way. Mickey, my good friend who is a taxidermist, recently wrote post on ethical taxidermy and how the term varies greatly because ethics are subjective. It’s an important read and it’s important for you to decide for yourself what is okay. I would never kill for my collection, and I certainly hope you wouldn’t either but being able to use a part of animal that someone else would otherwise just throw away is perfectly fine by me.
The best way I can recommend to get skulls is to let people know to keep their eyes open for you. Put out feelers. People won’t know to give you skulls unless they know you’re interested!
Just a reminder that, in most states picking up roadkill is illegal without a permit, so do your research if that’s a route you’d like to take! And if you’re in the US – stop picking up bird skulls. Bird law is real.

Gather your supplies.
I have a locker in my dads garage filled with my supplies, inside are…
▴ Gloves. Elbow length & regular disposable rubber ones.
▴ Heavy duty vinyl apron. You don’t want to splash anything on yourself, believe me.
▴ Respirator. Maceration is very smelly process, more on this below.
▴ Scalpel handle and blades.
▴ Field instrument kit. You don’t actually need everything in this kit but I’ve found it incredibly helpful!
▴ Bucket with lid. The container some kitty litters come in works too!
▴ Peroxide. Not bleach. Never bleach.
▴ Small container only slightly larger than the skull you’re working on.
▴ White Elmer’s Glue.
It’s always a good idea to have an extra pair of gloves and a few plastic bags in your car or camera bag if you’re hoping to find skulls while you’re out and about. Nothing worse than finding a great specimen and having no way to transport it.
Cleaning.
There are lots of different ways to clean a skull. My method of choice is maceration. I simply skin the skull. (There are tons of tutorials online on skinning, it does take a bit of practice.) Then plop it in a bucket full of water. The bacteria eats away the flesh and after a period of time you’re left with a clean or mostly clean skull with fairly minimal work.
Hair is not broken down by maceration so you’ll be saving yourself lots of time by skinning the skull first. You’ll also want to remove eyeballs which is where the field instrument kit from above will come in handy.
I like maceration because it works well on animals in all different stages of decomposition. It’s obviously best on “fresh” flesh, the bacteria will flourish. Even with skulls that have dried or mummified flesh on them soaking them in the bucket will loosen anything so it’s easily removed. Another up side to maceration is that everything is contained so there’s no worry of another animal running off with your skull or losing any pieces during the cleaning process. The downsides are that is smells REALLY bad and it can take a while.
Most people you who use maceration as their cleaning technique keep their water at a constant temperature using an incubator or aquarium thermostat. Keeping the water warm helps provide the bacteria with a great habitat to live, and multiply. I actually don’t use any sort of water heating though. Simply because I don’t mind if it takes longer.
How long maceration takes really depends on the temperatures, and how large the animal is. I would say on average it takes 3-4 months for a skull to be finished without regulating the temperature. It’s a good idea to change your water at some point during the period if it gets particularly nasty.
Let me just reiterate one more time – maceration stinks. It’s probably one of the worst smells you’ll ever smell. Do not do it in your house, and don’t do it if you have a very small yard. Wear a respirator and if a friend is kind enough to let you do it on their large piece of property bring spare clothes because you’ll probably smell afterwards.

Maceration tips.
▴ Be patient. Maceration takes time, especially if you’re not regulating your temperature. I process skulls at my parents house since they live on seven acres. If I’m feeling particularly impatient I will take them out and do a little bit of work with my field kit, cutting off any flesh I can just to speed up the process. Wear your respirator if you do this, please!
▴ It’s a good idea to wrap skulls in cheesecloth or even old pantyhose before putting them in water. You want the liquefied tissue to be able to leak out yet you don’t want to lose the little pieces, like teeth.
▴ Don’t forget about your skulls. When you first start out the excitement will make it really really hard to forget about skulls you have soaking but after some time it is kind of easy to forget if you have anything processing or not. If left in water too long skulls can become weak, and brittle.
Whitening + Finishing Up.
After macerating you may need to do some finishing touches such as removing connective tissue. Use your field kit to remove any remaining tissue. EVERY SINGLE PIECE. Anything, I mean anything, left will start to smell eventually. Take your time looking over the skull and making sure there is nothing but bone. Gently hose down the skull, I wouldn’t recommend bringing it in the house at this time. It will most likely have a stench to it still.
Find a container only slighter larger than the skull you’re working with, fill it with peroxide and add the skull. Never ever ever use bleach. I don’t care who told you or where you read it was okay but it is not. Bleach ruins skulls. I don’t cover my skulls once they’re in the peroxide and I do leave them outside. The sun will help speed up the process. Depending on the size of the skull and the condition it’s in it shouldn’t take too long at all for it to whiten. Generally I’d say it takes three to four days, sometimes less and sometimes more.
After the peroxide bath I bring the skull inside, rinse it off then wash it with dish soap, rise again and set it on a wash cloth to dry. After they dry I start putting everything back together. Regular old Elmer’s Glue is what I use to glue the mandible back together and the teeth back in.
To glue the mandible back together I simply put glue on one side and squish the two pieces together. I set them down on a table, still holding them together, and place the skull on top making sure they fit together perfectly. If they do you should be able to leave the skull on top of the mandible while it dries. Just be careful not to bump it for the next twelve hours or so. Sometimes it’s a pain, and takes a bit of fiddling around before you can get them to balance perfectly.

This + That.
▴ I recommend the book Animal Skulls : A Guide to North American Species. It is a must have if you’re cleaning skulls. It’s a little bit pricey, even used but it’s so worth it. It has photos, measurements, and tons of information to help to correctly identify skulls. My favorite part are the life size illustrations of skulls.
▴ Sometimes I get comments wanting to know how I get skulls to look so nice, or so white and on top of all the information that I shared above it really depends on your specimen. Below are two cat skulls I have in my collection. The one on the left was found on the side of the tracks. Nature had already done the dirty work for me. The cat on the right was cleaned from start to finish by me. Other than just the nasal bone and a few teeth missing the skull on the right is a lot more weathered. No matter how long I soaked it or whatever, it would never ever look like the skull on the right. Generally speaking, skulls you clean yourself will be of higher quality than what you can find already cleaned.

This is obviously not an all encompassing post on skull cleaning. Like I said, there are lots of different ways, this is simply how I choose to do mine. I recommend doing as much reading on the subject as possible. Take pieces of information from many sources to find exactly what works for you. Just remember; don’t bleach and don’t boil! Good luck! If you have any questions, let me know!
xoxo

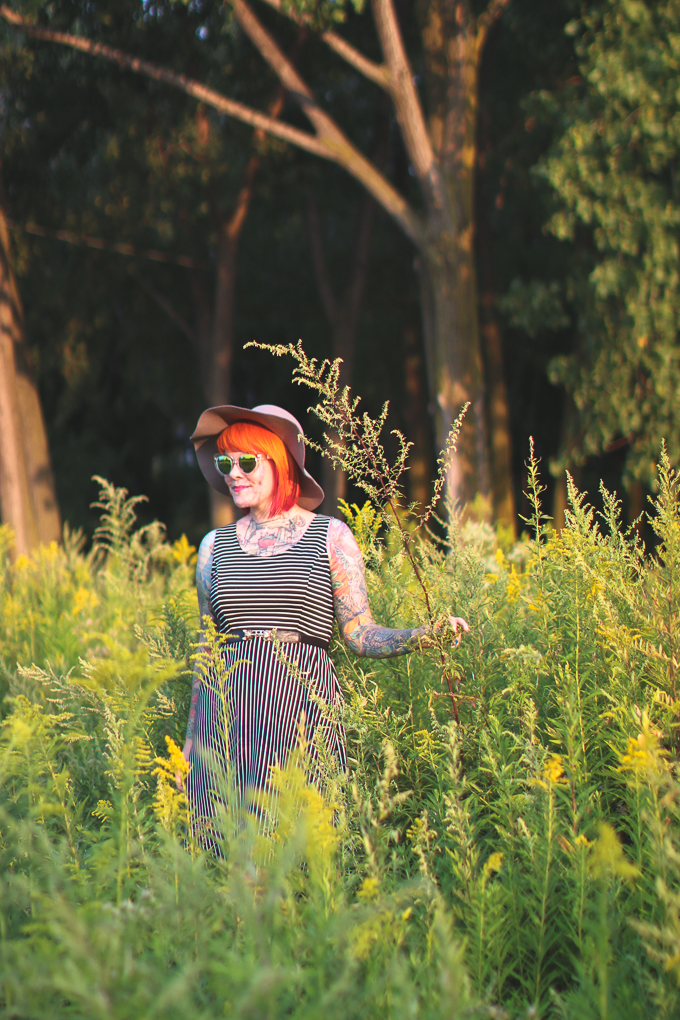

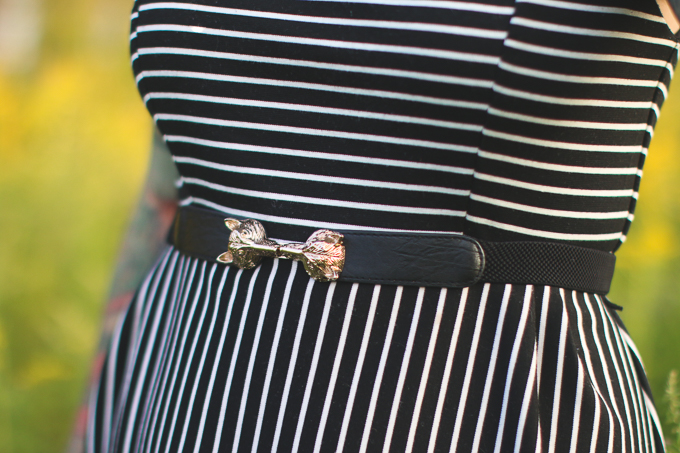

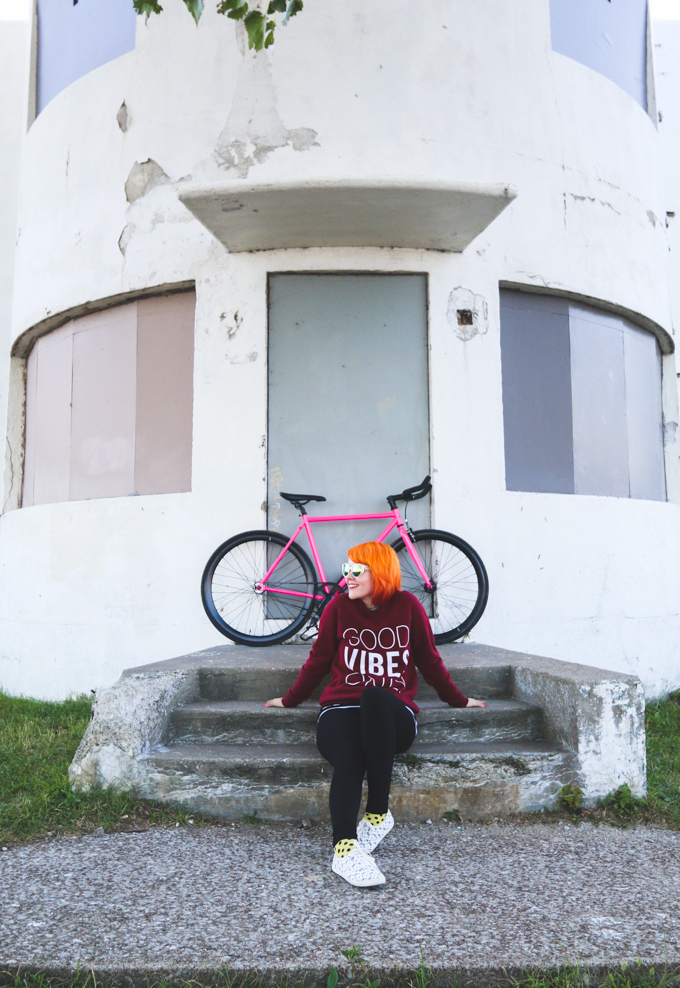
I’ve been trying to find the perfect time to wear this hat but y’all it has been way too hot to even try to look cute. I’ve basically been living in over-sized tshirts and my undies. These last few days I’ve gotten up early, taken my bike ride before even eating breakfast to beat the heat, and then stayed inside all day hibernating. I have three fans set up facing me in my office yet by 3 or 4pm I have to give up and take my laptop into my bedroom where I have a window A/C unit to continue working. I’m struggling through these last few weeks of summer. Being out early to ride has really opened my eyes to how lovely mornings are in the city though so yesterday I woke up super early and headed out to take outfit photos before it got too hot. I can at least pretend to be queen of summer, right?
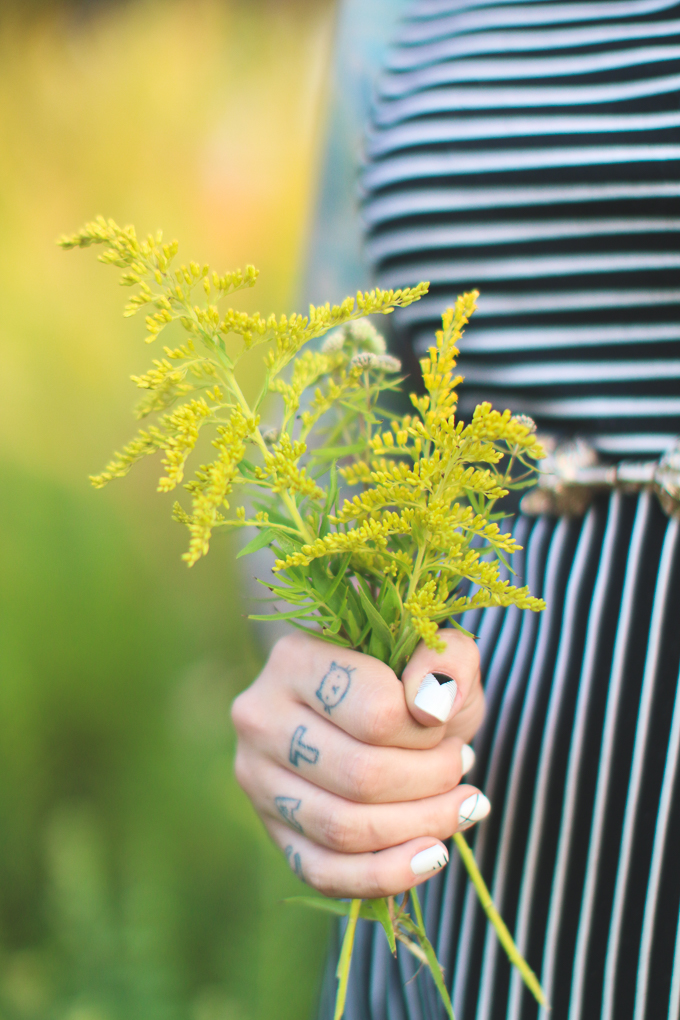
Despite it still being incredibly hot so early, my morning was wonderful. I got pictures I was happy with and I even saw some deer! I thought I saw something move out of the corner of my eye which I presumed was someone walking their dog and marveling at the girl tromping around in the flowers. When I looked up I saw two deer were watching me through a hole in the fence. It was so lovely, we just started at each other for a while before they were scared away by a train. I really enjoy sharing little moments like that with animals.


Can we talk about something kind of off topic for The Dainty Squid? Errrr, hold up, I never want to feel like something is “off topic”, I’d like this to be a place where I’m able to talk about all of my interests! I’ve mentioned it before but there are definitely topics that I feel maybe a little bit weird talking about and one of those things is makeup!
In the last few years I’ve really started getting into make up. I mean I wore it in high school but really really bad eyeliner and purple eyeshadow don’t count for too much. Hehe! I still have a lot to learn but I love to experiment. Maybe once a month or so I allow myself to purchase one or two new things to test out. The latest thing that I’m interested in is lip color. Not so much lipstick, but basically anything else. I’m not sure what the big deal is with lipstick but I feel uncomfortable in it. I kind of feel like this scene in Bruno (<— that’s NSFW) which is hilarious because lipstick is definitely not going to be what people look at when they stare at me. I think basically what it comes down to is that I like matte finish since I do own a few matte lipsticks that I really love.

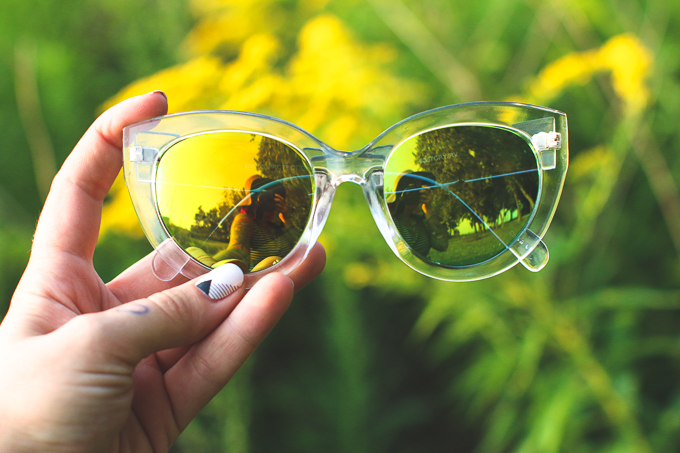
Anyway, I’m way into lip stains. I feel fairly comfortable wearing them and I’m always looking for new brands and products to try. A little while back when I was browsing the oh so dangerous make up aisles at Target I spotted Maybelline Color Blur lip colors. I chose My-My Magenta which matches my hair wonderfully. It’s super bright and I am LOVING it. The finish is so nice. It lasts for a long time without any touch ups, and I basically want to buy errrrrry color. It’s fun to branch out, and to still be able to find new things to try. I like pushing myself to do things that make me a bit uncomfortable. Having magenta lips definitely makes me a little bit self conscious but they just look so darn awesome!
xoxo

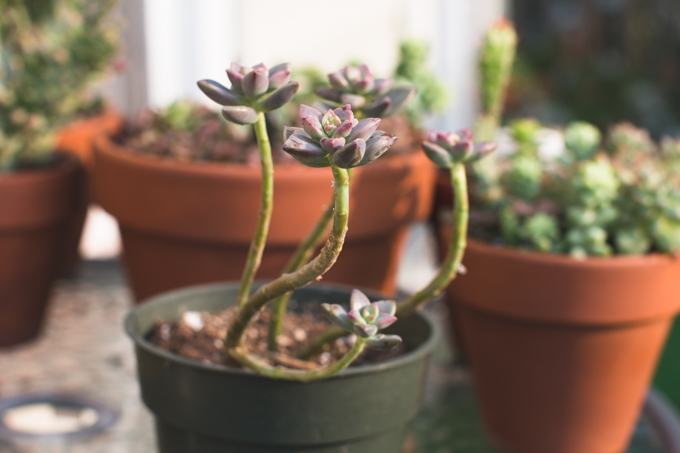
I haven’t been propagating succulents all that long but I’ve already learned quiet a bit and seen a great deal of success. Nearly every time I post photos of my babies on Instagram (…which is quite often) someone asks for help or exclaims frustration in their failed attempts to propagate. Propagation is incredibly simple once you know what you’re doing and it’s wildly satisfying! Today I’m going to share my method and a few tips that have helped me along the way.


Above is the perfect example of a plant that has gotten leggy due to lack of sunlight, and is in prime condition to propagate. I went to my favorite local garden center specifically to find a plant for this post. This one had already begun dropping it’s leaves and growing pups in the container.
What you’re going to do is remove the leaves. It’s very important to remove them properly. I genetly twist them from side to side, holding near the base. You’ll feel a little snap when it comes off. You need to be careful not to rip the leaf or else it will not grow. There should be no piece of the leaf left on the stem. When I first started that’s what I was most nervous about; removing my first leaf. It’s really simple and after your first one it’ll be easy peasy!


Remove all leaves that are a great distance apart from each other. After that you’ll be left with a pretty little rosette on a long stem. Your rosette may be made up of just three little tiny leaves, or a handful of larger ones it all just depends on the condition of your plant – either way it’s worth saving. Chop those bad boys off using sharp scissors, leaving an inch or so of stem. You’ll be able to plant them later.
Now you need somewhere to put all your leaves. I use a cake pan. It’s what I had on hand and it worked! I would never recommend something that doesn’t have holes in the bottom for your plants but because you’ll never actually be thoroughly watering the leaves or pups it doesn’t really matter. I fill the pan with cactus soil and perlite. (both of which can be found at Lowes, Home Depot or any garden center) I use approximately a 2:1 ratio. The perlite is important because it helps loosen the soil, and prevent compacting which helps with new root growth.

I lay out the leaves, and rosettes with the short stems on the soil/perlite mix and leave them alone for a couple days. The ends need to callous over or else they’ll absorb too much water and rot. After a few days I start spraying them with a squirt bottle. They don’t need much at all, just a quick mist. I do this daily. There are no hard and fast rules about watering your plants though. The best thing you can do is keep a close eye on them. Check on them every day, if they look dry, mist them. If not, leave them alone. Keep in mind that leaves without pups need less water than those showing growth.
They’re going to need lots of light to grow. Depending on your climate and your home just having your pan of leaves near a window should be sufficient. Leaves and the baby plants you’ll be growing are delicate; too much sun may burn them. After getting fairly comfortable with propagation I moved my babies outside where they receive maybe three or four hours of direct sunlight every day and they’re thriving. I wouldn’t recommend direct sunlight when you’re first starting out though. Start by a window that receives lots of natural light during the day.


Now it’s time to wait. Patience is important here! It’ll take a few weeks, some plants take waaaay longer than others, but eventually you’ll start to see growth. Keep misting regularly! The mother leaf will start to shrivel. I never remove it, I just let it shrivel up completely but if you do decide to remove it once you have decent sized new growth be sure not to accidentally rip off the roots.
When my new plants have grown to about the size in the photo above that’s when I start replanting them. They’re still very delicate and will need misted often. When replanting I use 3:1 or 4:1 cactus to perlite mixture. With ample water and sunlight your new babies should continue to thrive!

Tips for propagation success!
▴ SPRAY BOTTLE. Buy one, use it, be amazed! No, but seriously, you need one. If you try to just water your leaves and cuttings as you would a regular plant you’ll most likely drown them.
▴Don’t forget about the stem from your plant you took the cuttings from, that will produce new growth as well! Since it already has established roots it will produce growth much faster.


▴ I once read “If it looks like a plant, plant it” and that tip has been invaluable. It seems so obvious now that I have an idea of what I’m doing with plants but as a beginner it completely opened my eyes to everything that I could propagate. Below is an example of something that I would have never thought to do anything with. That cactus is now what I would consider a mother plant, every time she produces new growth like the two bunny ears shown in the photos I remove them to make new plants. I’ve had nothing but success with that cactus and the pups, they root beautifully! This is a very general rule but if you can twist it off, like the leaves of succulents, you can grow it.


While researching propagation before I started I noticed that nearly everyone had a slightly different method, varying most when it came what to do after the leaves have calloused over. I decided to just do a mix of everything I read. It works wonderfully for me. If my method doesn’t work for you I definitely suggest doing more research. Don’t give up after one failed attempt! Propagation is WAY too much fun. You’ll be amazed how proud you can be of one tiny plant.
Good luck!
xoxo
To see more photos of my plant collection browse the “plants” tag or follow me on instagram.

I’m finally at the end of my photos from mine and Jeff’s big adventure at the beginning of June. I feel like I’ve just been holding on to these photos to make it feel like I wasn’t finally done. Writing these posts and looking back through the photos have been a great help in soothing my ache to travel. I’ve been having dreams these last few weeks where we’re out in the desert again. I literally get teary eyed even trying to explain how much I love the desert. Being in a car in the middle of my desert with just Jeff, and all our camera gear is when I’m happiest.

Back to the subject at hand, our last big stop of the trip – Joshua Tree! We were on our back to Phoenix after spending the night at Wigwam Village when we just so happened to pass a sign for Joshua Tree National Park. It wasn’t something that was even on our mind and we were more than ready to get to our final hotel of the trip but we figured at the very least we could get some more stamps in our national park passport book. We picked up a park map, and chose a spot to get out and play so we could say we spent a little bit of time there. The very first thing I spotted on the map was the Cholla Cactus Garden – that without a doubt was what I really wanted to see.


It’s just a quick walk through the garden but it was an excellent one none-the-less. We took photos, admired tiny birds nests in the cactus, and took silly panoramic iPhone photos where it looked like Jeff was floating.
Last year while we were at Noah’s Art I was walking backward taking photos and not paying attention when I got one of these cactus stuck my ankle. I called Jeff over and had him pry it off with a stick. I almost immediately regretted not stopping to photograph it before removing it but I was left with a little reminder anyway – it actually bruised! It was sore for the whole rest of the trip too. Since that was my only previous experience with cholla cactus I did my best to be oh so careful in this garden full of them.


Guess its time to plan another trip now, right?
xoxo
You can find more posts from our road trip under the “travel” tag.

One of my greatest joys in life is crossing off goals. That sounds weird, but stay with me here, I just find such great pleasure in making goals and accomplishing them. It doesn’t matter how silly the goal it is or how insignificant it may seem to someone else, I just love accomplishing things. Some days on my to-do list along with work related things I’ll write “shower”, “make bed”, etc just because I love crossing things off.
Since the second I learned about Wigwam Village a few years back I knew I needed to stay there. I love tacky roadside attractions, and tourist traps. It’s just so kitsch, how could you not love it!? For the longest time I couldn’t find anyone to go with. The only one I knew of at the time was in seven hours away in Kentucky. No one saw the point except me.

Fast forward a few years to June of 2014, Jeff and I are getting ready to head out west on our first big road trip together. While looking up things in the area I realized there was another Wigwam Village in Holbrook, Arizona. We stayed, and it was just awesome as I had made it out to be in my mind. It was in no way luxurious but it was awesome!
When I got home I did a bunch of research on the history of Wigwam Village. Originally built in the 1930s + 40s, there were seven Wigwam Village locations. Now only three remain, each of which has been added to the National Register of Historic Places. Holbrook, Arizona, Cave City, Kentucky, and San Bernardino, California. I had to visit the other two!
A few months later, for our six month anniversary Jeff and I took a trip down to Cave City and stayed at that Wigwam Village. Then in June, while on our most recent road trip, we finally crossed number three off the list, San Bernardino – number seven of the original seven! I say finally but we managed to stay at all three of the remaining Wigwam Villages in a span of just a few days over a year which is pretty darn awesome, right?!


Of the three Wigwam Villages I think this one was the nicest inside. It might have even been bit bigger than the others as well. That’s not to put the others down though, all three were clean, had friendly staff, and made for super cool photo opportunities.
I celebrated crossing off my goal of staying at the three remaining Wigwam Villages by getting a permanent souvenir. While shoving my face with a delicious burger from In-N-Out I searched for tattoo artists in the area. I wasn’t able to find one in San Bernardino on such short notice but found Mikey Sarratt at High Noon Tattoo in Phoenix. He not only responded to my email super quickly, but came in on his day off just to do this little tattoo. I was SO nervous but I seriously could not be happier with the finished result!
xoxo
Special thanks to Jeff for being more than willing to make all my silly little dreams come true. That guy hates staying anywhere but really nice hotels but made the exception because he understood how much it meant to me. You da best! I love you!

For over fifteen years I’ve been dying my hair bright, unnatural colors. Over this time I’ve written numerous posts about hair. I thought it might be beneficial to finally create a master post of sorts where I can link to all the important posts involving hair that I’ve published. I plan on keeping this post updated with links to any future hair posts I write as well.

 Manic Panic in Sunshine, Hot Hot Pink, Pillarbox Red, and Pretty Flamingo. Color Jamz in Yellin Yellow. Punky Colour in Fire.


As of June 2019, I also have YouTube channel where I share my hair dyeing adventures. Might be a fun place to browse if you’re looking for more details on how I did a specific dye job.


As much as I’d love to help people out with their hair, I can’t. Everyone’s hair is different. How your hair reacts to a certain product or color may be the complete opposite of how mine does. I’m simply sharing as much as I can about what I’ve found works for me. For that reason, I cannot give out any further advice. I can’t tell you what brand and color will make a certain shade in your hair but I can tell you that the adventure of it is half the fun!
If you have any general questions or questions about my hair – let me know. I’ll be keeping this post updated with relevant information.
 Good luck!
xoxo

Photography has always been something I loved but for the longest time I never really saw any reason to upgrade my equipment. I stand by the notion that a good photographer can take a great photo no matter the equipment but y’all having awesome equipment sure does help!
The very first non-kit lens I bought many moons ago was the Canon 50mm f/1.8 II which I had actually read about on someone’s blog. I liked their pictures, and their FAQ included a link to that lens along with a few sentences about how much they loved it. I bought it same day. The internet is full of recommendations on camera equipment – and just about everything else but hearing that someone I know, whether that be online or in person, loves something and reading what the practical application for me is is what is most important to me when choosing what to spend my money on.
It’s been a while since I updated my equipment list here on the blog and since my last update I’ve found a handful of new things that I just can’t imagine myself not shooting with!

1. This shutter release is seriously one of the best things I’ve ever bought. You can either push+hold the button to take a single picture or set the timer to for it to shoot a few seconds (or minutes) later. If you put your camera in sports/ high speed continuous mode, and set the timer for a few seconds long it will take a series of photos for you. It’s a thousand times better than just a remote and an absolute must have if you take outfit pictures! It also makes taking long exposures easier since using the shutter release minimizes the possibility of camera shake.
2. The Canon 10-22mm f/3.5-4.5 was something that as soon as I got it I wondered how I had shot all these years without it. I just never realized how often I could benefit from having a wide angle lens. I find it most useful when shooting photos of abandoned building, landscapes, rooms in my home, etc. The whole room photos in my apartment tour are a great example of what this lens can capture.
3. Canon 100mm f/2.8, my macro lens! Perfect for shooting insects, and close ups of plants. It might be one of my least used lenses but when I do find a use for it I am so happy to have it. Here are two posts featuring examples of what the lens can do – 1 + 2. The photos of elephant seals I shot along the coast were taken with this lens as well.
If you’re not one hundred perfect sold on putting out the money for a macro lens I recommend macro filters. For under fifteen bucks you can take some pretty awesome close up shots!
4. Canon 35mm f/1.4L. So it’s technically not my lens, it’s Jeffs, but this was the lens that made me realize L-series lenses were no joke. This was one of the first outfit photo set I shot with that lens and I just remember being blown away. Before purchasing the 50mm 1.2, this was basically my every day lens. It just takes some seriously gorgeous photos! Good glass is worth the money.
5. I recently upgraded to the Canon 70D. I did a ton of research before pulling the trigger just to make sure it was the right camera for me – I’m pumped! It was important to me to buy another camera with a flip out screen since a lot of the photos I take for the blog involve me shooting photos of myself. It’s an excellent way to make sure I’m in the frame. It’s also useful for shooting things low to the ground while not getting your knees dirty.
6. The 50mm 1.2, ooooh boy. This lens is what dreams are made of. I splurged and bought this puppy for my birthday and haven’t looked back since. It rarely leaves my camera now. The plant photos in this post were taken with this lens. I’m sure after having it for a little while longer I’ll have more articulate things to say about it but right now I’m just feeling very “wooooow” about it.

My top two film cameras are the Pentax K1000 and the Canon T2. I love them both equally but have figured out which works best for me in certain situations. The Pentax K1000 is a manual camera, you have to focus and adjust the settings properly yourself. It’s an excellent camera to learn to shoot film on. I use it most for landscapes, and subjects that don’t move too quickly. The Canon T2, on the other hand, does have auto focus. It’s my camera of choice when I know I’ll be shooting animals (like at the deer park) and children since I’m still not that quick at focusing on my own.
As far as 35mm film goes, I’m not that picky. I will shoot with anything I can get my hands on. I tend to most frequently purchase Fuji 35mm Superia X-TRA 400 because Amazon has it for a decent price.


My pride and joy, the land camera. This is my absolute FAVORITE camera. I bought mine from Film Photography Project on ebay a few years ago or so when they were having a sale. They do currently have a few in their webstore. They’re slightly pricey compared to what you’d find at a thrift store or estate sale but they have been tested and come with batteries. Plus they have really great service that I can attest to! When I first got the camera I had no idea what to do with but it actually came with an instructional DVD to help you out.
Film for land cameras can be found on amazon, black and white or color. The black and white film was recently discontinued, hence the major price difference, so if you’d like some I’d stock up while you still can.


I own a handful of camera bags, it’s kind of my thing. Some people collect shoes or purses, I have camera bags. I very rarely leave my house without a camera so it’s important to me to have something safe to tote them around in. My current favorites are the Bellbrook Backpack and a cross body leather bag called Siena, both of which are from Jo Totes. I own more of her bags than any other brand. They’re stylish, and functional! You can find lots of photos of my camera bags, and how they look on by browsing through my What I Wore archives.
Those are my favorite, and most commonly used photography related things. I also have a list of just for fun cameras that I love, you can read more here! Or if you’re interested in instant photography (with easily accessible film!) you can read more here.
xoxo