As someone with a fairly unique wardrobe, brightly colored hair, and nearly half my body covered in tattoos you probably wouldn’t think I’m shy about self expression but it’s only recently that I’ve gotten brave enough to begin experimenting with make-up. My mom has never worn much make-up and I have two much older brothers so needless to say I didn’t really grow up around it. Photographic evidence shows I’ve done some regrettable things with eyeliner but lipstick has always kind of been a no-go for me. I felt so obnoxious in it, like everyone was definitely looking at me. Nope, it wasn’t the tattoos or green hair. It’s definitely lipstick people are going to stare at. Yeah, I don’t understand that logic either. I always loved the way it looked on other people and wanted to wear it for myself.
A really long time ago my best friend wrote a post about wearing crazy colored tights or maybe just crazy outfits in general, I don’t recall, and her number one tip was that she liked to wear these things around the house so that she could get used to the idea of it instead of immediately going out in public in it. I took that advice and applied it to lipstick. Eventually certain colors became no big deal at all, even in public. I may or may not be obsessed now. I love buying new colors and trying out different brands.
I would normally buy a new lipstick every other trip to Target or so. I like just picking up a little present for myself here and there. Since I wasn’t really sure what I liked in terms of lipstick colors, finishes, etc I was open to any and everything. Sometimes I’d come home and look up brand reviews or photos and for some reason, I kept stumbling across ColourPop even though they only sell online. I was instantly intrigued. They have a really great vibe, and the whole internet seemed to be in loooove with them. I liked their photos, and I liked that they had an active social media presence. Lots of photos to compare colors on instagram! Oh, did I forget to mention the best part? They’re super affordable! I finally decided I was ready to try them out a few weeks back. For $32 I was able to get six lipsticks, and one lip liner! Score!


So, did they live up to the hype? Uh, yes!!! I am in love. I honestly cannot wait to buy more. I’ve never felt so comfortable in lipstick as I do in these ones. Let me tell you a little bit more about my experience…
I bought two different kinds of lipstick, the Matte X, and Ulta Matte Lip. The Ulta Matte Lip is liquid but claims to dry completely kiss-proof. (Bumble seemed to be, but More Better transfers color.) I found that my lips would feel moderately dry and like they were flaking after a few hours but much to my surprise they still looked beautiful! No flakes at all. I love how long this stuff lasted, although as I’m sure anyone would agree, I could do without the flakey feeling. It did take some trial and error for me to apply it nicely as well. A little bit goes a long way. There were a few times in the beginning when I definitely over applied and ended up with a mess. I have no complaints what-so-ever with the Matte X lippies though! They apply easily and never left me feeling dried out.
Both the Matte X, and Ultra Matte Lip had a staying power that required the use of coconut oil for me to remove which I found pretty impressive. Coconut oil for errrrything!!! All of the colors I tried were super pigmented. I didn’t have to worry about building coverage either, they’re opaque.
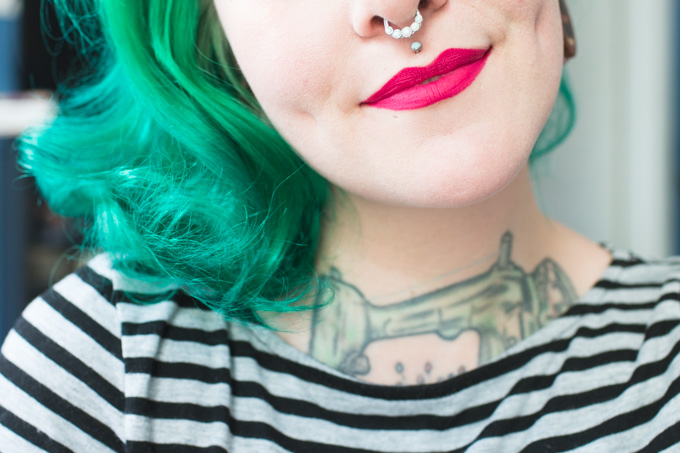
Even though I spent a ton of time comparing swatches and looking at photos of people who I thought had a similar skin tone wearing each shade I was still a little bit surprised by what each color looked like on my lips. Two of the shades – LBB + Back Up – I bought were, without a doubt, too dark for my tastes. At least for now, maybe someday I’ll be into that look. But I did find two colors that I’m just crazy for, Poppin’ + Contempo. Seen below.


Everything I bought from Colourpop lasted nearly all day before I felt like I needed to touch up which for someone super self conscious about their makeup is a really really awesome thing. For five or six bucks per color you really can’t beat it! I almost feel like I need to clarify, I don’t only like these because they’re cheap. It certainly adds to the appeal but I’d be happy with them if I had paid triple the price! I feel confident in them. Out of everything in my lipstick collection so far, these are the ones I find myself reaching for over and over!
Are these the absolute best things in the whole wide world? Probably not. Will someone find some sort of silly issue with them? Of course! But right now I can’t think of a way these could be better (…unless they were like hair dye, except for your lips because I think that’s a really fun idea. I’m only half joking too. I would love something slightly more permanent than lipstick.) Colourpop is super awesome, and affordable. I have definitely found my signature color for the summer in Poppin’!

Have you tried Colourpop yet? What do you think? What color is your favorite?! I’m going to have such a hard time choosing which to buy next.
xoxo